Teach Your Dog 31 Simple & Advanced Commands with Clicker Dog Training Teach 23 Tricks with Clicker Dog Clicker Training Dog Clicker Training Types 24 Dog Clicker Training Videos Dog Clicker Training Method Clicker Training Troubleshooting How to Clicker Train Your Dog Fastest Way to Clicker Train Your Dog Best Dog Clicker Reviews Dog Clicker Training Techniques Dog Clicker Training Video Guides Is clicker good for dog training? How do you train a dog with a clicker? What age should you start clicker training? How long do you use a clicker for dog training? What Age Clicker Training should begin? How to Prepare Dog for Clicker Training 12 Puppy Clicker Training Tips How Dog Clicker Training Works Leader Blind Dog Clicker Training Dog Clicker Training Tips & Tricks Clicker Training Basics Dog Clicker Training Benefits Clicker For Deaf Dogs - Flicker Dog Clicker Types Agressive Dog Clicker Training Clicker Dog Training Misconceptions Dog Clicker Training History What is Shaping
Dog-training clickers are simple, inexpensive small plastic devices. The metal strip inside makes a distinct clicking sound when pressed.
The clicker is not a remote control!
Do not point it at your dog. Instead put your hand behind you back or keep it to your side and click whenever your pet is doing the right thing.
Dogs are visually oriented animals, this means that they will use any body cue you give them. You want them to respond to the "sound", not your arm movement!
DOG CLICKER TRAINING: THE HISTORY This material proudly presented by WWW.WIKIPEDIA.ORG
Clicker training is a positive reinforcement animal training method based on a bridging stimulus - the clicker, in operant conditioning. The system uses conditioned reinforcers, which a trainer can deliver more quickly and more precisely than primary reinforcers such as food. The term "clicker" comes from a small metal cricket noisemaker adapted from a child's toy that the trainer uses to precisely mark the desired behavior. When training a new behavior, the clicker helps the animal to quickly identify the precise behavior that results in the treat.
Sometimes, instead of a click to mark the desired behavior, other distinctive sounds are made, such as "whistle, a click of the tongue, a snap of the fingers, or even a word, or visual or other sensory cues - such as a flashlight, hand sign, or vibrating collar, especially helpful for deaf animals.
THE HISTORY B. F. Skinner first identified and described the principles of operant conditioning that are used in clicker training. Two students of Skinner's, Marian Kruse and Keller Breland, worked with him researching pigeon behavior and training projects during World War II, when pigeons were taught to "bowl" - push a ball with their beaks.
They believed that traditional animal training was being needlessly hindered because methods of praise and reward then in use did not inform the animal of success with enough promptness and precision to create the required cognitive connections for speedy learning. They saw the potential for using the operation conditioning method in commercial animal training. The two in 1947 created Animal Behavior Enterprises (ABE), "the first commercial animal training business to intentionally and systematically incorporate the principles of behavior analysis and operant conditioning into animal training.
The Brelands coined the term "bridging stimulus" in the 1940s to refer to the function of a secondary reinforcer such as a whistle or click. Although the Brelands tried to promote clicker training for dogs in the 1940s and 1950s, and the method had been used successfully in zoos and marine mammal training, the method failed to catch on for dogs until the late 1980s and early 1990s. In 1992, animal trainers Karen Pryor and Gary Wilkes started giving clicker training seminars to dog owners.
Clickers are small mechanical noisemakers that emit an audible click when pressed. While they all generally work the same way, there are some differences between devices that may make one more desirable for owners over another. The clicker is useful because it
1. Is precise: marks the exact moment the dog performs a behavior you like
2. Is fast: processes instantly - faster than words!
3. Is unique: only heard when something good is about to happen
4. Is consistent: always sounds the same
5. Is safe and forgiving of mistakes: won't set back your training or damage your relationship with your dog
6. It inspires focus, enthusiasm and creativity: creates a safe, nurturing learning environment with clear communication that will bring out the best in your puppy
7. Allows for valuable, precise information from pet parent to pooch
8. Teaches dogs to think and control the outcome without the use of force
9. Dogs get to work for the click
10. Eliminates mixed signals to your dog and delivers a clear message without confusing your dog
11. Makes for easy positive dog training methods to train for specific behaviors
12. Allows for no blame training and positive outcomes for both pet parent and pooch
13. Provides mental stimulation
14. Can be used to curtail aggression, biting, attention-getting behavior and excessive barking or digging
15. The clicker marks the exact second that your dog performs the required behavior
16. Timing of the click is so important for clicker training to be effective, with each click necessitating a reward for the performed behavior
17. The click sound tells your dog exactly what behavior he is being rewarded for
18. Marker words like "yes" can be used in conjunction with the click. Dogs that have hearing issues can learn via a tap on the shoulder and reward
Box Clicker - Bulky, rectangular metallic clickers that are louder than standard clickers, making them ideal for outdoor and long-distance training.
Standard Clicker - A classic, no-frills clicker with a medium click sound. The most common type of clicker you will see online and in stores.
Adjustable-Tone Clicker - A few clickers offer the ability to adjust the volume of the clicker depending on the environment or your dog's sensitivities.
Soft Clicker - Some clickers are designed to have a softer clicking sound, which is ideal for nervous or easily-frightened dogs.
Ring Clicker - Clickers which can be looped around a finger, making them easy to maneuver when your hands are full.
Flicker - For deaf dogs, options include a special hand signal, a vibrating remote collar (sans shock), and the ingenious Flicker, a visual clicker for deaf dogs made of what appears to be a keychain flashlight and a ping-pong ball.
A D V E R T I S E M E N T
DOG CLICKER TRAINING TYPES This material proudly presented by WWW.INSTRUCTABLES.COM and WWW.K9DEB.COM and WWW.AKC.ORG and Thomas Wipperman and Kristina Lotz
Traditional training methods involve physically manipulating your dog's body and then using a cue with those manipulations. These methods do work, and the dog does learn, but it is not the most effective way to teach your dog. This is where clicker training shines. You are teaching your dog to WANT to listen to you.
Every interaction you have with the dog ends in a positive outcome. When you use clicker training, you are teaching your dog how to learn. You open up an amazing avenue for communication which helps improve the canine-human bond, which results in your dog wanting to listen and learn. In short, you get your dream dog and your dog gets his "dream" owner.
The most common way to teach a dog to stop barking with clicker training is to use the idea of behavior extinction. Extinction is when a behavior or action is no longer rewarding, so the dog stops doing it because it simply is not worth doing. The way we accomplish this is to change how your dog is receiving his reinforcement to bark.
Operant Behavior A behavior that elicits a consequence is called an operant behavior. Operant conditioning concentrates on the relationship between various outcomes of operant behaviors. Outcomes can be positive consequences, negative consequences, or punishment.
Positive Reinforcement Positive reinforcement is when you encourage an operant behavior by rewarding it with something good. Examples of rewards include treats, playing with a toy, silly talk, petting, running and pretty much anything that your dog likes. In terms of physiology, most positive reinforcement methods stimulate a dopamine response at the basal ganglia (brain stem). It makes them happy, feel good, and makes him want to do the action again.
Negative Reinforcement Negative reinforcement is a very subtle concept, and it can have profound effects on what your dog learns. Negative reinforcement is when you take something bad or unpleasant away. Contrary to popular belief, negative reinforcement is NOT a punishment.
Punishment Punishment is when you do something unpleasant in response to a behavior your dog exhibited. This includes spraying with a water bottle, smacking, pinching, blowing, shouting, rubbing noses in urine and feces, news paper hitting, and any other aversive behavior. I personally would never condone punishment as an effective way to train your dog. Punishment tends to stimulate an adrenal response, which is also known as the "fight or flight" response hard wired into pretty much everything that lives.
In addition to the adrenaline response, all sorts of stress hormones can be released as well. These stress hormones interfere with the learning functions of the brain, which is completely counterproductive when it comes to training. Using punishment can lead to a fearful dog, which in turn can lead to a dog that is unstable or one that will bite, which is a fear response in stressful situations.
COMMON DOG BEHAVIORS THAT DEMAND CLICKER TRAINING This material proudly presented by WWW.FURBO.COM
It is a pretty safe bet that any puppy you take home is in serious need of some obedience training, but if you adopt an older dog from a shelter or agency, you may have a furbaby with some training already. It is probably best to do some training either way so that you can make sure you and your baby are on the same wavelength and avoid or modify any potentially problematic behaviors like biting, barking and peeing on the floor.
Some pups need more attention than others when it comes to obedience, and bad doggy behavior might be harder to spot than you think. Each of these common puppy behaviors is harmless enough when your dog is young, but they will quickly become less controllable in older dogs who never learn the difference between good and bad behavior.
If your pup frequently displays these habits, you can lovingly and positively steer them toward better behavior with clicker training. To determine whether your new family member needs help with their behavior, look for these common signs that it is a good idea to clicker train your dog:
Barking Barking is normal behavior for our little fluffy babies, right? Dogs do use barking to communicate, and it is natural for your furbaby to make some noise now and then. However, if your dog is barking at all hours of the day and night, yapping at everything they see or anything that moves, it can point to an underlying behavioral issue. A little positive reinforcement and clicker discipline can help teach your dog to stay quieter and calm down.
Jumping You may love it when your baby comes to the door to greet you when you get home, jumping up on your legs and putting their paws on your chest with a furiously wagging tail. However, it is not actually a behavior you should encourage - especially if your puppy will grow into a sizeable adult dog. Allowing them to jump up will inevitably cause problems when you have guests over or take your furbaby for a walk because others probably won't appreciate your baby's muddy paws, claws and weight on them. Unchecked jumping can lead to unpleasant behavioral patterns.
Aggression If your dog is possessive of food or aggressive toward people or other pets, behavior training is a must. Growling, barking or lunging at people or animals is not only dangerous to them but also to your dog. You do not want your pooch to get into fights or to scare kids and upset parents when you take them outside. You want everyone to love your dog as much as you do. Letting aggression go unchecked won't teach them to be friendly and well-behaved, but positive reinforcement methods like dog training with a clicker will.
Tail-Chasing Watching your puppy chase their tail is adorable, but it points to pent-up energy and boredom, which can morph into aggression or uncontrollable behavior as your dog gets older. If your pup has a habit of going after their tail, you can divert their attention, teach them tricks and ensure good behavior with a little training.
Leash-Pulling When you go outside for a nice stroll down the street to stimulate your dog's senses and let out energy, does the pup walk you instead of the other way around? Pulling and straining against a leash during walks can just mean a dog is excited, but if you let your floof lead the way and find yourself wrapping the leash around your hand so that it is not jerked out of your grip, you need to check the behavior. Otherwise, it will never stop, and your dog will be less likely to listen to other commands.
Ignoring Does your puppy come running when you call their name? If you have trouble gaining or keeping your dog's attention when you call him, it is time to implement some training to make sure they keep an ear out and listen to your commands. In fact, this could be the first step you take toward better behavior.
DOG CLICKER TRAINING: THE BENEFITS & DISADVANTAGES This material proudly presented by WWW.GREENGARAGE BLOG.ORG and Brandon Miller
Dog clicker training is a method which uses a unique sound to tell the canine that he has done something correctly. Since the sound is challenging to replicate in their regular environment, it becomes a distinctive reward whenever they hear it. You can produce this noise with a handheld device that will create the sound when you press it.
This option is one of the most popular choices to use when completing positive dog training. Some dogs respond to clicker training and others do not, so an evaluation of the pros and cons is essential to know if this option would work for your needs. Some dogs are very afraid of this sound. You might encounter past abuse issues that they associate with clicking if you adopted a rescue animal. If you see a negative reaction, then discontinue this training method immediately. Dogs who are anxious and afraid will not respond well to the device.
THE BENEFITS
1. It creates a highly rewarding atmosphere for your dog Because the clicker becomes associated with an anticipation for a reward, you are creating a highly positive environment for your dog that encourages them to learn and follow commands. They are more willing to start exploring with this training option, which means their curiosity engages to try new things. That is why using this marker as a foundation for a reward is such an effective tool. Some dogs even want to keep learning new things because they enjoy the rewards of their clicker training so much!
2. You can use this training method in any environment Every time you click, then give your dog a treat. You are going to make their day because it feels like free praise and good snacks is coming their way. Do not click and treat at the same time. Follow the treat up after you make the click. Another option is to toss the treat on the ground and click your clicker right before your pet eats it. You can use this training while sitting down, standing up, or moving around the house. This process helps your dog to understand that they can receive a great reward in any environment. The click tells them that they did something right.
3. Clicker training works with other marker types as well There are several different tools that you can use with dog clicker training to serve as your marker. Animal trainers sometimes use whistles to associate a specific amount of praise when a pet does something correctly. Even your voice can become a marker, using a single word like "yes" or "good" to indicate praise to your dog. If you discover that your pet is afraid of the unnatural clicking sound, then you might try to use verbal markers instead to see if you can start making some progress. Your words must be sharp, outside of your everyday conversation, and short. Do not use the dog's name as the reward point.
4. There is no delay in the reward with clicker training Dogs receive an immediate reward at every stage of the training process when you use a clicker as your marker. Your pet understands immediately that they did something correctly, which reinforces their good behavior. That instant gratification is a powerful motivational tool for most dogs, since they love to please their owners. Even high-energy pups respond well to this instantaneous award, so you can communicate clearly that you are happy. That will make your pet happy in return.
5. You get to eliminate any unintentional misinterpretations of your inflection If you use a voice response as your marker when training this way, then the inflection of your tone and non-verbal body language can get in the way of the reward. When you use a clicker, then you eliminate any of the variations that your dog might pick up on as you are offering them a reward. Changes in your inflection can be confusing to canines, especially if there is more than one person involved with the behavior modification. By using the clicking tool, the sound will always be the same in every situation.
6. Multiple people can work on the training program for your dog When your dog responds to the sound of a click, then anyone can produce that sound from your device. That means you can hire behavioral specialists to work with your pet if there are days when you do not have the time to do so. Your significant other can work with you as well to manage the environment, especially if you are working with a larger breed like a Great Dane, St. Bernard, or Newfoundland. As long as the process of receiving a click remains the same, your dog won't be confused when everyone starts saying that they are a good boy or girl. They will just listen for the click to sound.
THE DISADVANTAGES
1. It can become an expensive venture for some dogs Clicker training works best when you have a puppy because the treat to clicker ratio is going to be 1 for 1 until they begin to understand that the sound is the equivalent of a "Good boy!" You can still use this training method for adult dogs successfully, but the treat you provide them must be meaningful. That means bigger treats are needed for the larger dog breeds, which can get to be an expensive proposition. You might go through an entire box of bones in a couple of days you are trying to modify some inappropriate behaviors.
2. Some dogs do not respond well to the sound of the clicker There are some dogs who do not like the sound of the clicker as a training tool at all. You can avoid this disadvantage somewhat if you do not point the device at your canine as if it were a remote control that turns the dog on or off. Try to hold it by your side or behind your back and offer a click that way.
If you are still getting an adverse reaction from your pet, then you may want to muffle the sound of your device to see if that makes things better. There are softer clickers on the market you can try as well. If your pet is one of the few who does not like this sound at all, then forcing dog clicker training on them will not produce positive results. You will want to try an alternative training method in that circumstance.
3. You must use this training method with precision Because you are working to develop a positive sound association with something that you know your dog will love - a treat, there must be a precision to your actions that is not always necessary with other methods. You must only use the clicker once when your pet does what they are supposed to do after a command. Once you make the sound during your training, then you must produce a treat.
Even an accidental click can associate a positive relation to a specific behavior that can be challenging to adjust. Repetition is also necessary. When your dog is sitting, click the clicker and produce a treat. Then repeat whenever you see them sitting. Once your dog understands the meaning of your command, then you are ready to ask for an action. If you click prematurely, you might need to start all over.
4. Your dog will need to have a high drive in a reward category for this to be effective Because dog clicker training uses a rewards-based mechanism to encourage behavioral change, your pet will need to have a high food or toy drive for this method to be useful. If you are dealing with a canine that does not really care about those rewards and there is nothing valuable enough to use as a reward for them, then it will be challenging to train your dog when using this method. Every dog has a drive for something, but it must be a givable reward that you can offer with a click. Going for a walk after every sit might get you a lot of exercise, but it won't be an impactful training tool.
5. The learned behaviors through dog clicker training are more prone to abandonment If your dog clicker training work is not completed correctly, especially as you transition to the variable treat giving stage, then you might find behavior abandonment waiting for you. Random reinforcements can be challenging to use if the drive for the reward is even a touch low.
When this disadvantage occurs, then the behaviors or actions practiced with the canine may begin to fade or disappear entirely. Intelligent pets can struggle in this area because they are so used to receiving a reward for their actions. Since they can not "manipulate" you into providing a constant treat, then you can bet your dog will start doing their own thing once again.
6. Advanced exercises require excellent timer Dog clicker training requires a lot of practice and knowledge to be effective. The outcomes which are possible depend on what you are trying to teach your pet. If you are going through the basic commands of sit, stay, and come, then you can get away with clicks that are not perfect every so often. If you are working on advanced commands, exercises, or behaviors, then your hand-eye coordination must be perfect for this tool to be effective. If you are unsure about how well you can respond in a training situation, then it might be a good idea to try a different training option first.
7. There can be conditioning problems with dog clicker training One of the most significant disadvantages that some pet owners encounter with clicker training is that their dog becomes conditioned to the sound. There are canines who will refuse to obey a command until they hear the sound associated with a reward. You can begin to ween some dogs away from this behavior by associated the sound of your voice with a reward in the same manner you did with the clicker, but it is not effective 100% of the time. When you see that your pet is responding consistently to the clicker, then it is time to begin using it less often.
8. It can become a cumbersome training method at times If you are working with a larger dog with a clicker, then the entire process can be difficult to manage. There are times when you will need to hold your treats, the clicker, and the leash all at the same time. Your clicker will always take up one hand. Because you need to click whenever you see the desired result, the multitasking functions that become necessary at times can set your training back unintentionally.
You may need to work with a partner if your dog weighs about as much as you do to ensure that the entire process goes smoothly. If you are the type of person who is a bit fumbly every so often, try to use a clicker which can wrap around your finger or wrist. You will still need to control everything, but it can lessen the complications of multitasking.
To click and reward a behavior you like, you first need to find a way to get your dog to do that behavior. Clicker trainers usually use three ways to accomplish this: catching, shaping and luring. Before starting a training session, decide which method will work best for the behavior you want, and then take a few moments to think through the steps you will take to get accomplish your goal.
The first step in clicker training is teaching the animal to associate the clicker sound or other chosen marker such as a whistle with a treat. Every time the click sounds, a treat is offered immediately. Next the click is used to signal that a desired behavior has happened.
WHAT IS THE MEANING OF THE CLICK The clicker is merely a way to mark a moment. There is nothing magical about that specific noise, except that you likely never make it around your dog outside of training. Therefore, you can substitute anything as a marker as long as it is distinct from other ways you communicate with your dog. For example, you could snap your fingers, blow a whistle, or cluck your tongue. Many people use a marker word like "Yes" or "Good."
For a hearing-impaired dog, you could use a light or a gentle tap on the shoulder.
Of course, the click or other marker itself is meaningless until it is paired with a reward. The click simply indicates a reward is on the way. Although edible treats are the best incentive for most dogs, a reward is anything your dog values. So if your pup would rather work for a game of tug of war than a chunk of chicken, play that instead. The important part is timing and consistency. The click must mark the correct moment and every click must be followed by a reward.
CLICKER TRAINING vs MARKER WORDS A marker word and a clicker work the same way, but there are two major differences between them. These differences help account for the reasons that clicker training has become so popular. First, a clicker is an unmistakable, distinct sound. We are constantly offering our dogs words, and no matter what marker word you have chosen, it is likely to be one your dog will hear at times that are irrelevant to their training, like when speaking to a friend or family member.
A click, though? That is a sound that only occurs when you are actually holding a clicker and, chances are, you won't be handling one unless you are training your dog. Second, the clicker is a neutral sound. It does not convey happiness or sadness or any other emotional tone: it is just a click. Using a neutral sound can take some of the confusion or stress your dog might feel around trying to determine your mood and help them focus better on the tasks at hand.
CLICKER TRAINING REWARDS
High Value Reward: While many food motivated dogs will work for kibble, sometimes trainers use a higher value food reward such as small bits of cheese or cooked meat for extra motivation when the distraction levels or high or when training a particularly challenging behaviour.
Fading the Reward: It is a myth that dogs trained with a clicker are always dependent on food rewards to do tricks or behaviours. In fact, once a dog has learned and perfected a behaviour the reward is faded using a variety of techniques such as behaviour chaining, randomising reward, and raising the criteria threshold.
Rate of Reward: This is simply how often you reward your dog over time during a training session. Pro dog trainers know that the faster the rate of reward, the faster a dog will learn. Adjusting the rate of reward is something that the trainer does by setting the criteria low enough that the dog is successful as often as every 3-10 seconds, especially when training a new behaviour.
HOW DOG CLICKER TRAINING WORKS Clicker Training works by building an association between being rewarded and hearing the clicker. Dog thrive off association, so we use this to our advantage by making something that is easy to replicate into a positive for them. By building the association between the "click" and "reward", every time they hear the Clicker, they will think the noise itself is a reward. This is the same conditioning originally used by Pavlov when he made dogs drool by ringing a bell.
He rung a bell every time a dog was given food, so the dogs began to associate the bell with food. Building associations like that is easy with dogs, which is why clicker training is so effective. Clickers are easy to handle, too, so we recommend getting a few to keep with you during training. You only need them during training new cues, not all the time, so if you are worried that you will have to carry a Clicker 24/7, rest easy.
PREPARE YOURSELF FOR DOG CLICKER TRAINING For newbies, the thought of starting clicker training can be overwhelming. It is difficult to imagine using a clicker in addition to all the other stuff you have to worry about when training your dog. You will want to put a little effort into perfecting your mechanics before introducing clicker training to your dog. Begin by holding the clicker in one hand and pressing the button with a finger from that same hand.
Once you have got a feel for that, it is time to practice the most crucial part of clicker training-timing. Sitting down in front of a TV show or movie, try clicking every time a particular actor appears on screen, every time a particular word is said, or in sync with some other detail that occurs randomly but regularly. Be sure to decide in advance exactly what you will be clicking for.
Once you have got this down, move on to your dog. Begin by clicking every time your dog looks at you. Follow your click with a food reward. Repeat this several times until you have gotten the hang of delivering the reward. This exercise does double duty by teaching your dog that the click is meaningful and awesome. The sequence should go like this:
1. Dog looks at you, either on his own or because you have gotten his attention.
2. Click the moment he looks.
3. Immediately follow the click with a treat.
PREPARE YOUR DOG FOR CLICKER TRAINING The process here is called "Loading the Clicker". Before you begin the training, get a Clicker, and some high value treats for your dog. Press the button on the Clicker so your dog can hear the noise, then immediately give your dog a treat. Repeat this anywhere from four to eight times, then let your dog reset and do something else. This will build the association between "click" and "reward". After a few minutes, call your dog back over, and repeat.
Your dog will start to realize that a "click" means something good is happening, and will try to perform actions that get the "click". Anytime you start a round of Clicker Training, make sure to reload that Clicker in the same way, just to remind your dog. Once your dog has built that association, you can begin Clicker Training. If your dog smells the treat and tries to get it by pawing, sniffing, or mouthing, simply close your hand around the treat and wait until he leaves you alone. Self-discipline is key! Click once and immediately open your hand to give your dog the treat. Put another treat in your closed hand, and resume watching TV or reading. Ignore your dog.
CHARGING THE CLICKER Activating or charging the clicker is the first and most important step when getting started with clicker training your dog. This is what makes the whole process work! The click! sound signals to your dog that he offered the behavior you want and will be rewarded for it.
DOG CLICKER TRAINING APPROACHES
Capturing: "Catching" means that you catch your pet in the act of doing the behavior you want. It is the perfect method for training behaviors that your pet already does on his own, like sitting, lying down and maybe rolling over on grass. For example, if you want to train your dog to lie down, you can stand in your living room with your dog and just wait. After a little while, your dog will probably decide to lie down and get comfortable.
The instant his body hits the floor, click and toss a treat on the ground a few feet in front of him. He will have to stand up to take the treat, so after he eats it you will be ready to start over again. Continue the sequence of waiting for your dog to lie down on his own, and then clicking and tossing a treat the moment he does. With repetition, your dog will eventually look at you and throw himself to the ground to earn his treat.
Shaping: With "shaping," you gradually build a new behavior by clicking and rewarding a series of small steps toward it. Shaping is a good method for training new behaviors or a series of behaviors called a "chain", that your pet does not already do on his own naturally-like raising a paw in the air, retrieving a ball or going to a specific spot to lie down. You start by rewarding the first small behavior that begins your pet on his journey toward the complete behavior. When he is mastered that first step, you ask a little more of him - require him to do the next small step to earn his click and treat.
For example, to get a dog to raise his paw, you might start by clicking and treating when he shifts his weight off one paw slightly. Once he is shifting his weight smoothly over several repetitions, you delay clicking until you see him lift his front paw off the floor just one inch. When he is good at tiny paw raises, delay your click again and require him to raise his paw another inch or two higher to earn his click and treat. By reinforcing each tiny step as if it were the ultimate goal, your dog will think that learning is fun and will soon be performing the goal behavior with enthusiasm.
Luring: "Luring" involves using a treat like a magnet or guide to get your pet into a desired position. The food lure - a small piece of tasty food, is held right in front of your dog's nose and then moved while he follows it. For example, to lure a dog into a down position, hold a piece of food in front of his nose and then slowly draw it straight down in front of his chest to the floor. The food will work like a magnet, drawing your dog's nose and then his body downward.
As his elbows touch the floor, click and treat for the down. After some practice, you can just use the hand motion to prompt your dog to lie down. Make the same movement as before, but with no treat in your hand. Over many repetitions, you can gradually make this hand signal smaller and shorter. Eventually, your dog will lie down when you point to the ground. Lure and Reward training is often quicker and more efficient than catching or shaping to get and reward certain behaviors.
Once the behavior is learned, the final step is to add a cue for the behavior, such as a word or a hand signal. The animal will have learned that a treat is on the way after completing the desired behavior. The basis of effective clicker training is precise timing to deliver the conditioned reinforcer at the same moment as the desired behaviour is offered.
The clicker is used as a "bridge" between the marking of the behaviour and the rewarding with a primary reinforcer such as a treat or a toy. The behaviour can be elicited by "luring", where a hand gesture or a treat is used to coax the dog to sit, for example, or by "shaping", where increasingly closer approximations to the desired behaviour are reinforced and by "capturing", where the dog's spontaneous offering of the behaviour is rewarded. Once a behaviour is learnt and is on cue - command, the clicker and the treats are faded out.
Adding the Cue: Whether you have used catching, shaping or luring to get a behavior you want, your next step is to add a cue or command. If you have used luring, you will know you are ready when your pet consistently does the behavior you want as soon as you give your hand signal. If you have used catching or shaping, you can add the cue when your pet is confidently offering the behavior over and over, without any other behaviors in between.
Good timing is essential. Be sure to say your cue before your pet does the behavior you want, not at the same time. If you practice the steps above in order, your pet will eventually learn what the cue means.
1. First say the cue word you'd like to use. Say it only once - do not nag!
2. Then ask or wait for the behavior. Use your hand signal to prompt your dog if you were luring. If you used catching or shaping, you will just wait after you give the cue for your pet to offer the behavior.
3. Click and treat the instant your pet performs the behavior.
Clickers are little plastic boxes you hold in your hand, you press down on the metal tongue to make the clicking noise. When training your dog the idea is to click at the exact moment they perform the desired action. It works so well with dogs by clearly communicating when they are doing the right thing. Clicker training your dog can be a really good way to get them to focus on what you are asking them to do. You can use a clicker during training to help your dog recognise when they have carried out a behaviour that will lead to a reward.
You can also use a marker word for training, such as saying "Yes" but using a clicker can be more predictable for your dog, and they will likely more strongly associate the sound with getting a treat. Our voices also naturally vary in tone, pitch and volume depending on lots of different things, but the clicker sound is consistent, and your dog will easily recognise it.
If your dog is noise sensitive and the clicker sound is worrying them, you can muffle the sound by clicking the clicker from inside your pocket. If they are still scared of the sound you should use a marker word instead.
CLICKER TIMING The timing of when you click the clicker is very important. Think of the click like you are taking a photo of the behaviour that you want. You must only click when your dog is doing the exact action you have asked for. For example, if you ask your dog to sit, but they also bark when they do so, if you click and reward them at this point you will also be encouraging them to bark too. In this instance, you would need to click before they bark, or only click and reward sits when they don’t bark.
The click must come exactly on the desired behaviour and it is important that you reward your dog within 3 seconds of the click. Try dropping a ball and clicking at the exact moment it touches the floor to practice! It is harder than it sounds. If you do not click at right time to reward your dog, this could frustrate them and reduce the effectiveness of the click. Being able to mark the exact moment my dog does the right thing with a clicker has worked wonders, it makes dog training so much easier. And the best part is getting started with clicker training is inexpensive and easy to do.
CLICKER TRAINING & CLASSICAL CONDITIONING
Do you remember Pavlov's dog? Pavlov was a Russian physiologist studying digestion when he discovered something interesting about his canine subjects. They began to salivate whenever one of his assistants would enter the room. They were learning this response in anticipation of the reward food, that was not being offered yet. This is now called classical conditioning - a learning process that occurs between an environmental stimulus and a naturally occurring one. It occurs with clicker training when your dog performs actions habitually.
Clicker training at the beginning is an example of classical conditioning. If used consistently it can become operational conditioning, where the dog intentionally repeats an action to gain a reward. The difference might seem minor but it has big implications on the behavior of your dog. If your dog is performing actions with a purpose rather than by habit he is going to retain much more information. Clicker training can help create a strong relationship with your dog. You can take a lot of the guess work of training out by being able to clearly communicate what behaviors you find desirable.
CLICKER TRAINING & CONFIDENCE
Clicker Training Can Build Confidence. With clicker training your dog is going to gain confidence because he feels he can have control over consequences. Dogs look forward to learning new behaviors when they are done in a positive way and when they know they can expect good rewards. This makes training so much easier in the long run because your dog will be more attentive and willing to please.
When teaching a dog a new behavior the clicker is your way of telling your dog exactly what behaviors are acceptable. Marking behavior with an exact sound for your dog gives him the only cue he needs to know he did the right thing. When we use a lot of verbal commands we often end up saying too much and our dogs do not always know what we are looking for. The clicker is a way to clearly communicate with your dog at the exact moment they do something awesome.
TIE CLICKER TRAINING TO REWARDS Clicker training is not meant to completely replace the use of treats. The sound of the click instantly tells the dog that what it has done will earn it a reward. To emphasize this, clicks should frequently be followed by treats. Otherwise, the clicker will lose its effectiveness. While some clicker trainers may not give a reward every time they click, pretty much all clicker trainers continue to follow the click with a reward. It is very important to use strong rewards a lot during initial training stages, and treats are often the strongest reward for a dog.
The basis of clicker training lies in operant conditioning, which is a scientific term that describes the way animals learn from the consequences of certain behaviors. Positive reinforcement is a type of operant conditioning often used in dog training. Since you will be offering a lot of treats, try to use smaller, but still enticing, treats that your dog enjoys. For an easy, low-cost option, use small pieces of unseasoned cooked turkey or chicken during your training.
IMPROVING CLARITY & PRECISION In some cases, it may not be as easy as you think to praise and reward for the behavior you want. The clicker can be very useful for these situations as well! Let's say you have a very excitable young dog who has a hard time sitting still, jumps on people to greet them, and leaps up to snatch treats from your hand during training class.
You want to teach him to stand quietly with all four feet on the floor, but how can you do this, when he starts to jump and bark as soon as you try to reward him? Using a clicker, you can do it easily. Keep the treats in your pocket, and your hands behind your back. Wait for the dog to stop moving on his own, just for a split second - then click that moment of stillness, and drop a treat on the floor for him to eat.
He may get excited again, which is fine. Just wait. Sooner or later, he will stop moving again and stand still. Immediately click, and drop another treat. Keep clicking and treating as long as he keeps four feet on the floor.
If he gets wound up and starts jumping again, just stop and wait for stillness, then click and treat. Within a few minutes, you can have a dog who is happily standing still and watching you attentively, rather than leaping all over you and mugging your hand for treats. The clicker allows you to make it clear exactly what you are rewarding for - standing still, even when it only happens for a moment.
PROMPTING, REINFORCEMENT AND FADING Prompting: Prompting occurs when you provide a signal to your dog that will help him to learn and perform new exercises. The hand motions you use to lure your dog into positions are an example of a gestural prompt.
Continuous Reinforcement: Your dog receives a reward - remember, the sound of the clicker, treats, petting, play, and praise are all rewards every time he performs a desired behavior. We recommend that you consistently offer some form of reward for your dog's good behavior.
Fading: Fading is the diminishment of prompts that you provide to your dog. An example of fading would be the gradual reduction of the hand motion you use to lure your dog into the sit position, until he sits on a verbal command without the need of a gestural prompt.
Most dog owners will want to fade the use of food as a continuous reinforcement to a more practical reward. Ultimately, verbal praise and a pat on the head should suffice in most situations. You should, of course, continue to give your dog occasional treats.
TEACH YOUR DOG BASIC COMMANDS WITH CLICKER Teach your dog basic commands using the clicker. At the exact moment your dog performs the desired action, press the clicker. Follow with a treat and praise. If you do not click at the right time, your dog will be confused and unsure of what action garnered the treat.
One of the best things about the clicker is accuracy. The dog associates its action with the click and, subsequently, the reward. Not only does the dog better understand what it is doing, but this also makes your pup more likely to repeat the action when asked in the future.
CLICKER TRAINING BASICS
If you are just getting started with clicker training the best place to start is with something simple like sit. Ask for the behavior and at the exact moment the dogs butt hits the ground click then give him a treat. Repeat this step a few more times, making sure to only click when his butt hits the ground and following up with a treat. Get the behavior, click the behavior and then reinforce the behavior. Generally dogs can catch on pretty quick with this method, and you might only need a few repetitions with something simple like sit before they are offering it themselves.
If you have a puppy that does not know how to sit yet a nice way to teach them is to hold out a treat and move it slightly above his head. As your dog follows the treat with his eyes he should naturally sit. If you hold it too high he may jump for it, and if you hold it too low he probably won't sit.
The key to clicker training is to make sure you click at the exact moment your dog does the desired behavior, and then use a treat for reinforcement. Only click once at the exact moment your dog does the desired behavior! And follow up every click with a treat!
Clicker training is not just used for tricks. You can use it to reward certain behaviors that you like. If you are on the couch watching TV and Fido comes over and lays down at your feet click and reward. If there is any behaviors you like you can always use clicker training as positive reinforcement. Dogs desire structure and look to you for direction. With a clicker you have an easy way to communicate to your dog exactly what behaviors are desired from him with one simple click.
You can test your success by clicking when your dog is not paying attention to you. If your dog responds to the click by suddenly looking at you, then looking for a treat, you are ready to move on. If not, continue with the click-treat combination until your dog is aware that every click means a treat. Begin with your dog in a quiet area without any distractions. Ideally, this training should be done when your dog is hungry. Have a handful of your dog's favorite treats ready and the clicker in your hand.
Step 1 - Show your dog how the clicker works, and what it does Before you start using a clicker, you will need to associate the "click" with something positive - the reward. This teaches your dog to anticipate their treat after they hear the "click". Make sure you do this in a calm environment, without any distractions. If your dog is food motivated, you can use some of your dog's dinner, to avoid using too many treats. When your dog is nice and calm, simply "click" and follow up with a treat, making sure it is given within 3 seconds. Repeat this process several times.
Step 2 - Start introducing the clicker when your dog does something good Once you can see that your dog is anticipating the food when they hear the click, you can start introducing the clicker to mark good behaviour. Ask your dog to do something simple that they already know, such as "sit" or "down". As soon your dog sits, click and reward them. Practice this regularly over a few, short sessions so that you can improve your timing and your dog can get used to using the clicker. When you are satisfied that your dog understands what the click means - they should immediately look to where the treats have been coming from, you can then move on to using the clicker to teach new behaviours.
Step 3 - Use the clicker as part of dog training Clicker training is a useful way to get a dog to work out what you want them to do of their own accord. This uses quite a bit of brain power for your dog and is a great way to mentally stimulate them. To use the clicker, first decide what the final behaviour is that you would like your dog to do, and then break it down into small steps. These should be progressive steps that if all clicked, rewarded and built on in sequence will eventually get you to the final behaviour. For example, if you are training your dog to sit on a mat, first reward any interest in the mat - click when your dog looks at the mat and then reward. Once they are doing this consistently, wait a few seconds for them to take a step towards the mat, and click and reward the step. Continue until eventually you hold out for a paw on the mat.
From there, then build up from two to three paws, until eventually you are only clicking and rewarding when all four paws on the mat. The last step would be to ask your dog to sit on the mat, and then to click and reward when they successfully do that. Next you can start ask your dog for a down when then they are on the mat, and only click and reward this.
Step 4 - Be consistent! The key to any dog training is consistency. While it is important that you only click on the desired behaviour that you are looking for at each step, if you do accidentally click then you should still follow up with a reward. This will make sure that your dog continues to associate the click with being rewarded and won't undo all of your hard work. It is also important to be consistent in how you click. We would advise holding your clicker in the palm of your hand to the side of your body. Do not hold your clicker like a remote and point it at your dog, as this can be intimidating.
CLICKER TRAINING TROUBLESHOOTING
If your dog does not seem to respond to the clicker at first you need to evaluate if it was introduced properly. Are you keeping them motivated by giving them a treat after the click? Are you remembering to only click once? Do not get too discouraged if your pup does not listen to new cues right away - some behaviors are quite challenging to teach. But as soon as he does get it you are going to click and reinforce, which in turn should help with further repetitions.
Clicker training is a great way to help your dog learn new things, but it can also get confusing if used incorrectly. When using a clicker remember to only click once. You want to click the moment your dog does the desired behavior and immediately follow it up with a treat. If you click more than once your dog won't know exactly what behavior you are rewarding. And remember to always follow up the click with a treat.
A common mistake when using the clicker for dog training is to forget the praise. While your dog has been trained to respond to the clicker, it is also following the actions to receive praise from you. Do not ignore a dog's need for praise, love, and affection from its owner.
Since clicker training is reward-based, if your dog has a low food-drive or is not driven by rewards or treats, this type of training likely won't be effective. Also, if you are using clicker training for more advanced movements or exercises, you need very precise hand-eye coordination and complete attention to click the clicker at the exact time you need. If you are not able to do this, you will confuse your dog and lead to poor training.
If your dog does not like the clicker Some dogs do not like the sharp sound a clicker makes. There are a couple of options if you find that your dog is afraid of the clicker. You can put layers of masking or duct tape on the back of the clicker or wrap it in a thick cloth to muffle the sound. Or you can use a different sound as a marker such as a clickable ink pen or snap your fingers.
If your dog is not interested in the treats Every dog is different and you will have to try different foods and objects to see what motivates your dog the most. If you free-feed, consider a switch to scheduled meals and train before mealtimes.
For clicker training to work, you need to click the moment your dog does the trick - you can not give him a chance to pop back up from his down. And that means you need excellent reaction time. If you improve your clicker skills, you and your dog will feel less stressed. And it will help prevent your dog from learning bad behaviors. To become a skilled clicker, there are some games you can play on your own or with a friend. They will improve your mechanical skill and treat delivery. Play these games without your dog:
Condition Your Dog To The Click Most clickers will come with instructions on how to get started. The first step will always be to teach your dog that the click means he will get a treat. To do this you will click and instantly give him a treat. You will likely have to do this 10 to 20 times before you start to give commands. Once you have conditioned your dog, you can start to train him.
Give him a command and the moment he follows through, click. Then grab and deliver the treat. Clicker training can be an effective way to teach your dog positive behaviors. But with any training - it will take time. Be patient and make sure you are ready to start before you get your dog involved. This will make you feel more confident which will reflect on your dog. The more comfortable you both are, the easier training will be.
1. Ball Drop Ball drop's an easy game you can use to practice your clicker skills. Take a ball and drop it to the ground. As soon as the ball makes contact with the floor, click. Let it bounce many times and click each time it makes contact.
2. Dice Game This game needs two people and a die. One of you will be even numbers and one of you will be odd. Each player will watch for their numbers. When their number appears, that player will click the clicker and quickly pick up the die to roll again.
3. Treat Toss Game When you train your dog, there will be many times when you have to toss a treat to him. This game will teach you to do that with speed and accuracy. You will need your clicker and a bowl for this game. Place the bowl on the ground. Click, grab a treat and toss it in the bowl. Repeat while you try to increase your speed and accuracy.
Once you are comfortable, time yourself to see how many treats you can get in the bowl in a minute. Or take 10 treats and click, grab, deliver. When you are out of treats count how many you got in the bowl. If you have 7 or less treats in the bowl, practice some more. Once you feel confident with your clicking skills - it is time to condition your dog.
3. Fastest Draw In The West This game takes your clicker training a step further. You will learn how to Click, Get the reward, Deliver the reward smoothly. To start ind a table and place a dish on it - the dish represents your dog. Click the clicker, get your reward from its holder. Treat pouches are very useful for clicker training since you only have one free hand. You can also use your pocket - just be sure your treats are easy to retrieve for fast delivery. Once you have the treat, place it in the dish.
This will get you into the rhythm. Click. Grab. Deliver. Click. Grab. Deliver. And that will help you to be more precise when you train your dog. Once you feel like you have smooth delivery, take it up a notch. Set a timer for one minute. See how many times you can click, grab and deliver. The goal is to get faster each time, while still maintaining accuracy. When you are training your dog, you want to get the treat directly into your dog's mouth, so be sure to get it directly in the bowl as you practice Use a smaller bowl to improve accuracy.
Clicker training is a terrific, science-based way to communicate with your pet. It is easier to learn than standard command-based training. You can clicker train any kind of animal, of any age. Puppies love it. Old dogs learn new tricks. You can clicker-train cats, birds, and other pets as well. Tips for successful clicker training:
1. Get a clicker with a wristband to keep it tethered to you in case you drop it or need to use your hand for something else.
2. Use a bait bag or treat pouch to hold your food rewards. You only have two hands - a bag lets you keep treats close and hands free.
3. The clicker does not cue your dog to do something, so do not use it like a remote control. Remember that the clicker marks the moment your dog has done something worth rewarding. Not the other way around.
4. Keep your training sessions short. Dogs learn better in bursts of 3–10 minutes than they do in long 30-60 minute sessions.
5. Push and release the springy end of the clicker, making a two-toned click. Then treat. Keep the treats small. Use a delicious treat at first: for a dog or cat, little cubes of roast chicken, not a lump of kibble.
6. Click DURING the desired behavior, not after it is completed. The timing of the click is crucial. Do not be dismayed if your pet stops the behavior when it hears the click. The click ends the behavior. Give the treat after that - the timing of the treat is not important.
7. Click when your dog or other pet does something you like. Begin with something easy that the pet is likely to do on its own. Ideas: sit, come toward you - touch your hand with its nose, lift a foot, touch and follow a target object such as a pencil or a spoon.
8. Click once: in-out. If you want to express special enthusiasm, increase the number of treats, not the number of clicks.
9. Keep practice sessions short. Much more is learned in three sessions of five minutes each than in an hour of boring repetition. You can get dramatic results, and teach your pet many new things, by fitting a few clicks a day here and there in your normal routine.
10. Fix bad behavior by clicking good behavior. Click the puppy for relieving itself in the proper spot. Click for paws on the ground, not on the visitors. Instead of scolding for making noise, click for silence. Cure leash-pulling by clicking and treating those moments when the leash happens to go slack.
11. Click for voluntary or accidental movements toward your goal. You may coax or lure the animal into a movement or position, but do not push, pull, or hold it. Let the animal discover how to do the behavior on its own. If you need a leash for safety's sake, loop it over your shoulder or tie it to your belt.
12. Do not wait for the "whole picture" or the perfect behavior. Click and treat for small movements in the right direction. You want the dog to sit, and it starts to crouch in back: click. You want it to come when called, and it takes a few steps your way: click.
13. Keep raising your goal. As soon as you have a good response - when a dog, for example, is voluntarily lying down, coming toward you, or sitting repeatedly-start asking for more. Wait a few beats, until the dog stays down a little longer, comes a little further, sits a little faster. Then click. This is called "shaping" a behavior.
14. When your animal has learned to do something for clicks, it will begin showing you the behavior spontaneously, trying to get you to click. Now is the time to begin offering a cue, such as a word or a hand signal. Start clicking for that behavior if it happens during or after the cue. Start ignoring that behavior when the cue was not given.
15. Do not order the animal around, clicker training is not command-based. If your dog does not respond to a cue, it is not disobeying, it just has not learned the cue completely. Find more ways to cue it and click it for the desired behavior. Try working in a quieter, less distracting place for a while. If you have more than one pet, separate them for training, and let them take turns.
16. Carry a clicker and "catch" cute behaviors like cocking the head, chasing the tail, or holding up one foot. You can click for many different behaviors, whenever you happen to notice them, without confusing your pet.
17. If you get mad, put the clicker away. Do not mix scoldings, leash-jerking, and correction training with clicker training, you will lose dog's confidence in the clicker and perhaps in you.
18. If you are not making progress with a particular behavior, you are probably clicking too late. Accurate timing is important. Get someone else to watch you, and perhaps to click for you, a few times.
19. Above all, have fun. Clicker training is a wonderful way to enrich your relationship with any learner.
20. A clicker only needs to be used during the training period. With practice and repetition, the desired behavior eventually becomes habitual and there will be no need for the clicker, though you can certainly continue to use it to mark behavior if you wish. Rewards and praise, on the other hand, should continue to be used and will always be appreciated by your dog.
21. If your dog is not food motivated, try giving another reward. For example, if your dog loves to play fetch, try throwing the tennis ball once after the clicking sound. In training, a reward is defined as something your dog loves or desires, it does not necessarily have to be food.
22. The trickiest part to clicker training is capturing the exact behavior you want with the click. But do not worry, making minor mistakes won't end up interfering with the training in the long run. Be as precise as you can and do not forget to have fun while doing it! Training is a fun bonding experience for you and your pet!
23. Do not Use the Clicker to Get Your Dog's Attention! The clicker has one job: to tell your dog exactly what behavior is earning treats right now. Think of the clicker as an asterisk or a spotlight, not as a remote. The clicker is for one thing and one thing only, and that is to illuminate for your dog exactly what behavior is earning treats right now.
People who are new to training their dogs often notice that the click gets their dog's attention, and then they start using the click to get their dog's attention. This works if you always follow the click with a treat, but it also winds up teaching the dog to do more of whatever he was doing when you tried to get his attention. Note that this is different from clicking and treating when your dog offers you his attention in the first place.
You can use a clicker to teach dog behaviours. Stick to teaching just one or two new commands at a time, and do not introduce new ones until your dog is confident with them. Otherwise they can easily get confused and find it difficult to learn.
If your dog is having trouble with a particular behavior, they may not understand what you want from them. If, for example, my dog does not understand that lowering my hand to the ground with my palm facing down is a request to lay down, that action will not be successful until I define it more clearly.
Instead of looking for my dog to lay down when I lower my hand, I can try dropping the criteria so that I begin by clicking and rewarding each time my dog follows my hand enough to bend toward the ground. Once they can do that consistently, I can up the criteria by looking for my dog to both curve toward the ground and stretch out one paw, and click and reward for that. Eventually, our criteria will return to looking for my dog to follow my hand into a full down.
1. Look - asking your dog to look directly at you, which can be helpful if you need to distract them quickly or just need them to pay attention to a more complicated command.
2. Stay - once your dog is confident sitting on command, try giving a verbal "stay" command and wait one second before clicking and rewarding. If they do not stay for that time, get them back to a sit and try again. Once they are happy waiting for a second, you can extend the time they have to wait for the click to two, then three, then 5 seconds. Keep building up until they are happy staying for a significant period. Then, you can add turning your back, working up to walking away with your dog maintaining the stay. Always build up gradually and do not move on until your dog reliably does the previous step.
3. Shake - gently tap the paw you want them to give and click and reward, if they lift it. Once they are reliably doing that, you can keep your hand out and only click once their paw touches your hand.
4. Lie down - lure your pet into a lying position using a treat or toy. This can be combined with very gentle pressure on their back. Click as soon as they are down. Build up to adding a command word and phasing out the lure like in the "sit" example.
5. Up and Down - you can use a lure to help your dog with these commands. Remember to click as soon as they do the thing you want.
6. Drop - using a click as well as a lure reward to "trade-off" can make training this behaviour very quick, as your dog can be sure they are being rewarded for leaving the thing you are asking them to rather than grabbing a new thing. You need to be very precise with your timing here – make sure you click right when your dog releases the thing they are holding, before they take the one they are offered.
7. Sit - Catch your dog in the act of sitting. As soon as he puts his behind on the ground, click and treat. Repeat this whenever you see him sitting and as he is in the act of sitting, say "sit" and click and treat when he has sat. When your dog understands the meaning of the word "sit" you are ready to ask him for the action. Ask your dog to "sit". As soon as your dog puts his behind on the ground, press the clicker and immediately follow with a food reward.
10. Lie on the Bed - You can use clicker training to teach your dog some bigger things, too. This can be, for example, getting your dog to lie on their bed when they are standing across the room. With more complicated training like this, you will need to train in stages. This means breaking down what you want your dog to do into steps and mastering each step before moving on. Training in steps like this is called "shaping" a behaviour. In getting your dog to go to lie in their bed on command, the first step might be clicking and rewarding when they look at their bed if you give them a certain command, like "bed".
Then you can progress to clicking only when they move towards it. Once they have figured that out only click when they are standing on it and eventually you will be able to give the command and they will go over and lie down in it. When you are training using these small steps, stop clicking for a step when you have moved on. You can use things like pointing or luring to help with some steps. This kind of training works best if your dog is very mentally engaged and curious. When shaping you might need to keep training sessions shorter because your dog can get easily frustrated if they can not figure out the next step.
Goal 1 - My dog spontaneously looks in the direction of the bed
21 ADVANCED COMMANDS: CLICKER TRAINING TECHNIQUES This article is proudly presented by WWW.STARMARK ACADEMY.COM and Starmark Pet Products Academy
Dogs make strong associations to places and situations. Always begin teaching new exercises in quiet, distraction-free locations. Once your dog has a basic understanding of his new command, it is essential for you to use that command in different locations and situations.
Asking your dog to Sit not just in your quiet living room, but also on walks or in the park, is an example of generalizing. Asking your dog to remain sitting as other dogs walk by or when you put his food bowl down is an example of proofing. Both proofing and generalizing are essential to maximize the benefits of training. Remember to put your dog into situations only when he is ready for them, and eventually he will perform reliably in any situation.
1. SIT COMMAND The Sit command is the most commonly used exercise in dog training. Most dogs have some understanding of what "Sit" means. There is no need to pair a command with the Sit for the first 2 training sessions. Adding the command after your dog has an idea of what to do makes it easier for him to learn the Sit command. The same principle applies to some of the other exercises when first introduced. Once you begin to pair the command Sit with sitting, you are ready to move on to the next exercise. If you ask your dog to Sit and he does not perform the command, repeat the command while gently pushing down on his rear with your left hand.If your dog offers the behavior of sitting on his own, capture the behavior by clicking.
1. With your dog at your left side, hold the leash in your right hand 2 feet from the snap. Hold a treat in your right hand between your thumb and forefinger. Hold the Training Clicker in your left hand.
2. Hold the treat slightly in front of your dog's nose, and raise it in a slight upward arc to lure him into the Sit position. Do not use the Sit command at this stage.
3. The moment your dog sits, click and reward him and immediately give your release word.
4. Repeat the above steps 15 times.
5. Practice the Sit without the command for 2 sessions.
6. On the third session, begin using the word "Sit" the moment your dog sits. Immediately click and reward him.
2. COME BACK WHEN CALLING Come Back When Called is the most important command you can teach your dog. For his own safety, it could be vital. Practice the Come command until your dog begins to come toward you without the need to lure him with a treat. Once this happens, try to "sneak away" from your dog and then say the command "Come." Click and back away as soon your dog turns toward you. Reward him with the treat when he reaches you. Never correct or punish a dog when he comes to you. Your dog must view coming to you as a positive experience. Keep training fun. Always give your dog plenty of verbal praise after you reward him with the treat. Come Back When Called is an important safety exercise. Set your dog up for success so that he never learns that "Come" does not mean come.
1. Hold the end of a 6-foot leash and Training Clicker in one hand and a treat in the other.
2. Wait for your dog to become distracted, and then hold the treat slightly in front of his nose.
3. When your dog shows interest in the treat, back away with your treat hand extended in front of you.
4. As you back away, bring your treat hand close to your body. When your dog reaches your treat hand, click and reward him.
5. Repeat this exercise until it is apparent that your dog understands he is rewarded with a treat when he comes to you, 15-20 repetitions should suffice.
6. Now say "Come" the moment he moves toward you. Click and reward your dog when he comes to you.
3. PLACE COMMAND The Place command is a great way for your dog to learn a "Boundary-Stay" for an extended period, yet remain comfortable. Your dog will quickly learn to go to a slightly elevated and comfortable surface - like dog bed, and remain there until released. When your dog is on his Place, he may do as he pleases. Use a dog bed with distinct, elevated boundaries to allow your dog to easily identify when he is on the bed. The boundaries of mats, small rugs or towels can be difficult for your dog to identify.
You may find that your dog attempts to go to his bed without your guidance or from farther away than 2 feet. Click and reward him for doing so. Make sure that you do not click until all four of your dogэs feet are on the bed. Your dog needs to understand that getting all four feet on the bed is the appropriate behavior. The Place should be an exercise that your dog enjoys performing. Do not use the Place as a Time Out or for punishment.
You may practice the Place command in different locations by moving the dog bed throughout your home, provided that each area is quiet and free from distraction during this stage of the training. When your dog is on the Place, he may do anything he wants except get off the place. He can sit, lie down, stand up, chew on toy, play dead, and more.
Once your dog has learned the Place command, it is easy to teach your dog that anything that has a clear boundary is a Place, such as a chair, bench, grooming table, weight scale, fluffy dog bed, and more. Once your dog is proficient at the Place command, it becomes an excellent tool to use when company comes over. Instead of being banished to the back yard, your dog can be taught to stay on his Place when guests come over.
1. Stand 2 feet in front of your dog's bed with your dog at your left. Hold the leash in your left hand 2 feet from the snap. Hold a treat in your right hand between your thumb and forefinger. Hold the Training Clicker in your left hand.
The Place should be an exercise that your dog enjoys performing. Do not use the Place as a Time Out or for punishment. You may practice the Place command in different locations by moving the dog bed throughout your home, provided that each area is quiet and free from distraction during this stage of the training.
3. The moment all four of his paws are on the bed, click and reward your dog with a treat. Release your dog and encourage him to come off the dog bed. Do not use the Place command at this stage.
4. Repeat the above steps 15 or 20 times until it is apparent that your dog understands he is rewarded once he gets on his bed.
5. Practice for 2 training sessions without the command.
6. On the third session, begin using the word "Place" the moment all four of his paws are on the bed. Immediately click and reward your dog. You may quietly praise him after he has been rewarded.
4. WALKING ON A LOOSE LEASH It takes a little practice to teach your dog to walk peacefully by your side, but you will both enjoy leisurely walks once you show him that it is pleasant to stay next to you instead of pulling on the leash. Your dog should match his pace to yours, not the other way around. Keep your leash loose enough to form a slight loop between you and your dog. The snap attached to your dog's collar should swing as you walk. Practice walking on a loose leash in the forward direction only at this stage of the training. Many dogs are stubborn leash-pullers. If your dog fits this description, ask your retailer about the Training Collar. Using the Training Collar in conjunction with the Training Clicker will make teaching your dog how to walk peacefully by your side much easier.
1. Have your dog Sit at your left side with his shoulder aligned with your knee.
2. Hold the end of your leash and the Training Clicker in your right hand, grasping the remainder of the leash with your left hand. The leash should be loose enough to form a slight loop between you and your dog with the snap hanging down. Maintain a natural body posture when holding the leash.
3. Walk forward, encouraging your dog to move with you if necessary.
4. If your dog forges ahead, lags behind, or sways away from the appropriate position, immediately stop walking. Do not say anything to your dog. When you stop, your dog will try different behaviors - pull harder, go right, go left. Once the leash is loose, click and reward, and begin the exercise again.
5. When your dog walks by your side for 2 paces on the loose leash, click and reward him, and immediately say your release word. Repeat and increase the number of forward steps by recognizing the moment of good behavior with a click and reward.
6. Repeat the above steps until your dog has walked by your side properly and has been rewarded for doing so 10 times. You may quietly praise him after he has been rewarded.
7. Once your dog understands the correct position for walking, introduce a command for walking on a loose leash, such as "Heel," "Let's go" or "Let's walk." Use this command for walking when you begin to move forward and just before you click and reward the dog for being in the correct position.
8. Once your dog has associated the command with walking, gradually work up to 10 paces before you click, reward and release him.
5. SIT-STAY COMMAND Teaching your dog to Stay in one place is one of the most useful and enjoyable aspects of having a mannerly, well-trained dog. We will use the Sit command to introduce Stay into your dog's routine. Although it is common for people to tell their dog to "Stay," it is not necessary to do so. When you say "Sit," to your dog, it should mean "Sit and Stay," until he is released. Do not release your dog from a distance - staying close to him will help to keep him calm and will discourage him from anticipating the release command. When teaching your dog to Stay, you increase the amount of time he stays by gradually delaying the click and reward. Your dog eventually will learn to Stay even if you walk away from him.
1. With your dog at your left side, give the "Sit" command.
2. Click, reward and release him if he sits for 3 seconds.
3. If your dog gets up before you click and reward him, repeat the command "Sit," and help him back into position if necessary.
4. Repeat the above steps 5 times.
5. Repeat the above steps again, but this time click, reward and release your dog for remaining in the Sit position for 5 seconds.
6. Repeat the above steps until your dog can remain in the Sit position for 10 seconds by the end of your first training session.
7. Start your second training session by clicking, rewarding and releasing your dog after he has remained in the Sit position for 5 seconds. Gradually delay the click and reward until you end this session with your dog remaining in the Sit position for 15 seconds.
8. Expect your dog to remain in the Sit position for longer periods until he can remain sitting by your side for 1 minute. The number of sessions it takes to reach this goal varies, but most dogs will learn a 1 minute Sit-Stay within 10 sessions.
6. SIT-STAY & WALK AWAY COMMAND Until this point in the training, all the exercises have involved keeping your dog close or having him come toward you. Once your dog can Sit by your side for 1 minute, teach him that remaining in position when you walk away is also a positive experience. During each session, gradually increase the duration that your dog remains sitting, until he can do so for 1 minute with you 2 feet away. Gradually step farther away from your dog until he can remain sitting for 1 minute with you 6 feet away. Practice the Sit-Stay while you prepare your dog's food. Doing so will help him learn self-control. Have him remain sitting for 10 seconds before giving him his food. If your dog continually breaks the Sit, pivot directly in front of him and repeat the exercise.
1. With your dog on leash and at your left side, give the command "Sit."
2. Wait about 5 seconds, and then repeat the command "Sit" as you step directly in front of your dog. Hold the leash loosely throughout the exercise.
3. Wait an additional 5 seconds while in front of your dog.
4. Return to the starting position on the left side of your dog and wait an additional 5 seconds.
5. Click, reward and release your dog.
6. Repeat the steps 5 times.
7. On the fifth correct repetition, step 2 paces back after you have pivoted in front of your dog. Have your dog remain in position for 10 seconds. Return to the starting position and wait an additional 5 seconds. Click, reward and release your dog.
8. If at any time your dog gets up from the Sit position before you click, reward and release, guide him back to the spot he was sitting and repeat the Sit command, helping him into position if necessary.
7. DOWN COMMAND The Down command is second only to Come Back When Called when it comes to having a safe, reliable dog. The Down command provides you with more control than a Sit command, and because it is a more comfortable position for your dog, he will Stay in that position for greater lengths of time. The Down command is also an effective way to communicate your leadership role to your dog. Although it is important to take your time when teaching any obedience command, it is especially so with the Down command. Dogs see this position as a subordinate posture and as a result, some may resist it. If your dog has severe behavioral problems, such as dominance or fear-induced aggression, consult with a qualified training and behavior specialist or a veterinarian before beginning this or any training program.
You can help your dog into position by placing your left hand just behind his withers (shoulders) to gently guide him toward the ground using a slight left to right rocking motion. Capture your dog going into the Down position when not training. To do so, click and reward him whenever you see him lie down on his own. If your Training Clicker is not handy, quietly praise him. The Down command is an important exercise for your dog to master. Practice it daily. As your training progresses, you will learn many useful applications of this exercise. Remember to take your time teaching the Down command. Do not add the Down command until your dog goes into the position willingly.
1. Hold the leash and treat in your right hand. Hold the Training Clicker in your left hand.
2. With your dog at your left, give the command "Sit."
3. Hold the treat slightly in front of your dog's nose, and slowly lower it toward the ground. Be sure to lower it slowly enough so that your dog can follow its path. Place your left hand just behind his shoulders to help him into position if necessary.
4. Continue to lower the treat until it is on the ground and between your dog's paws. Keep the treat between your thumb and forefinger. It is acceptable to crouch as you lower the treat.
5. The moment your dog's elbows are resting on the ground and he is settled into a Down position, click, reward and release him.
6. Repeat the above steps 15 times.
7. Practice the Down for 4 training sessions.
8. On the fifth session, say the command "Down" the moment the dog is in position. Immediately click, reward and release him.
8. PLACE - STAY Your dog now should be ready to remain on his Place for longer periods. Practice the Place steps in each training session until your dog will remain on his Place for 5 minutes. Once you have reached the 5 minute goal, move on to the next exercise. Allow your dog to have a favorite chew toy to work on when you ask him to remain on Place for extended periods. Position your dog's Place near a chair or where you can relax. Ensure that you are close enough to the Place should he break his command and need guidance.
Gradually introduce distractions into your training sessions such as soft clapping or the rolling of a ball. Remember, do not click, reward and release your dog until he has completed your time goal for a particular repetition. However, you may reward his continued good behavior by giving him a treat every 30 seconds or so when practicing for extended periods. Do not allow him off his Place if you do so. Do not use the Sit or Down commands themselves while your dog is on the Place.
1. Stand 2 feet in front of your dog's Place with your dog at your left side.
2. Give your dog the command "Place," and take a step forward. Do not lure him with a treat. Guide him onto his bed with the leash if necessary.
3. Have your dog remain on his Place for 10 seconds.
4. Click, reward and release him and encourage him to come off his Place. Do not release your dog from a distance, staying close to him will help to keep him calm and will discourage him from anticipating the release command.
5. If your dog breaks his command before you click, reward and release, repeat the command "Place" and guide him back onto his Place. Expect him to remain in position until you have reached your time goal for that repetition.
6. Repeat the above steps as many as 10 times or until he will remain on his Place for 1 minute. Add at least 5 seconds to each repetition before you click, reward and release him.
7. Begin the next training session by having your dog remain on his Place for 30 seconds. Add 15 seconds to each repetition until your dog will remain on his Place for 2 minutes.
8. Occasionally move slowly around the perimeter of your dog's Place. Your dog may follow your movements, but he must remain on his Place.
9. PLACE - STAY & WALK AWAY Now that you have taught your dog to go to his Place and remain there for as long as 5 minutes, you should teach him to remain on his Place even as you move around or walk away from him. As a rule, it is best to keep training sessions to less than 15 minutes, but your dog ultimately should remain on a Place-Stay for as long as 30 minutes. Once your dog has mastered a 10-minute Place, it is time to incorporate this exercise into your daily routine. Use any or all of the following suggestions: If you want to use a dog bed as your dog's place, you can transition from the elevated platform to your dog's bed. The elevated platform initially helps your dog understand the exercise and the boundaries of the Place. Position your dog's Place in an area where you can see it while you watch television, read or enjoy quiet time. It is acceptable to get up and go to your dog to give him a treat and pet him on occasion.
Bring your dog's Place into your home office and expect him to remain there as you work. If you have young children, teach your dog that he can and should relax on his Place even if the kids are playing in the house. Keep an eye on your dog to ensure that he does not break his command. Teach your children that the Place is a quiet spot for your dog and discourage them from approaching him to play while he is there. When you have guests, have your dog remain on his Place while you tend to them. When your dog seems settled and comfortable on his Place, you may begin to step out of sight for a few seconds. If he remains on his Place, you can give him a treat. Gradually extend the duration that you are out of sight.
1. With your dog facing the bed give him the Place command, guiding him onto his bed with the leash if necessary.
2. Step 4 feet from your dog and casually move around the perimeter of his Place for 1 minute.
3. Give your dog a treat, but do not allow him to move off his Place.
4. Drop your leash, and step 6 feet away from your dog, casually moving around the perimeter of his Place for another minute.
5. Return to your dog.
6. Wait 10 seconds, then click, reward and release your dog.
7. Repeat the above steps twice.
8. With each training session, add 1 minute to the time your dog must Stay on his Place and 2 additional steps of distance from him until you are 10 feet away, and he will remain on his Place for 10 minutes.
10. DOWN - STAY By now you should notice a positive change in your relationship with your dog. He should be more mannerly and eager to please, and more willing to take direction. Incorporating the Down-Stay will help strengthen your relationship by further establishing your role as a leader to your dog. The Down-Stay has one more element of equal importance: safety. Along with Come Back When Called, the Down-Stay will help keep your dog safe in situations that you do not control.
Dogs are highly sensitive to body language. Practice giving your Down command while standing in an upright, normal posture. When practicing the Down-Stay for extended periods, it is acceptable to give your dog a bite-sized treat every 30 seconds. Gentle petting is also encouraged so that your dog learns to remain in position even during such interactions. Should your dog break his command when you pet or praise him, withhold the praise and petting, repeat the command "Down" and redirect him into position.
1. With your dog at your left side, give the command "Down," helping him if necessary.
2. Stand upright and guide your dog back into the Down position if he attempts to get up.
3. Once your dog has remained in the Down position for 3 seconds, click, reward and release him. Do not release your dog from a distance, staying close to him will help to keep him calm and will discourage him from anticipating the release command.
4. Repeat the above steps 5 times.
5. Repeat the above steps again, but this time click, reward and release your dog for remaining in the Down position for 5 seconds.
6. Repeat the above steps until your dog can remain in the Down position for 10 seconds by the end of your first training session.
7. Begin your second training session by expecting your dog to remain in the Down position for 5 seconds before you click, reward and release him. Gradually delay the click, reward and release until you end this session with your dog remaining in the Down position for 15 seconds.
8. Gradually increase the length of time in the Down position until your dog maintains it for 3 minutes. The number of training sessions this will take varies, but most dogs learn the command within 10 sessions.
11. DOWN - STAY & WALK AWAY Now that you have taught your dog to remain in the Down position by your side, you can teach him to maintain the position while you step away from him. Doing so will help him to become a safer, more reliable and enjoyable companion. During each session, gradually increase the duration that your dog remains in the Down position until he can maintain it for 3 minutes with you 2 feet away. Gradually begin to step farther away from your dog while he remains in the Down position until he can do so for 5 minutes with you 6 feet away.
Once you have reached the 5 minute, 6-foot goal, begin to move from side to side slowly. Ultimately, you should be able to walk behind and around your dog while he remains in the Down position. You may test your dog by dropping the leash, but remain close enough to grasp it again if you need it. Remember, when practicing any Stay exercise for an extended time, you can give your dog treats and gently pet him on occasion. Your dog should remain in position as you do so.
1. With your dog on leash and at your left side, give the Down command.
2. Wait about 5 seconds, then repeat the Down command as you pivot directly in front of your dog.
3. Wait 5 seconds while in front of your dog. Lean down and give your dog a treat. Stand up, but be ready to help your dog back into position if he moves.
4. Return to the starting position on the left side of your dog and wait an additional 5 seconds. Click, reward and release your dog.
5. Repeat the above steps 5 times.
6. On the fifth correct repetition, pivot in front of your dog and wait 5 seconds. Then step 2 paces back. Have your dog remain in position for 10 seconds.
7. Return to the starting position and wait an additional 5 seconds. Click, reward and release your dog. You may quietly praise him after you release him.
8. Repeat the above steps again, but have your dog remain in position for 10 seconds. If at any time your dog gets up before you release him, use the leash to guide him back to the spot where he was laying and return him to the Down position.
12. COME BACK WHEN CALLED This important exercise should be practiced daily. At this stage in training, you will teach your dog to Come Back When Called from a distance with the use of a 20-30 foot long line. We recommend that you use a long line and not a retractable leash. Although retractables are convenient and valuable training tools, they keep a constant tension on your dog's collar. You want your dog to come when you ask him to - not because he feels tension from a leash. Ultimately, you will want your dog to come back to you even when he is off-leash, and using a long line is one of the most effective ways to develop a consistent Come Back When Called.
Reel in your long line as your dog comes toward you to prevent you or your dog from becoming entangled in it. Backward movement will encourage your dog to come toward you. Keep the Come exciting and fun for your dog. When your dog comes toward you, do not show him the treat. Give him his reward once he catches up to you. Do not step forward and reach out for your dog. Reaching out may trigger a "chase" play response. Remember to keep your leash loose when you practice the Come command. Doing so ensures that your dog is not coming back to you because he feels tension on a leash or is being forced back. As with all exercises, it is important that you train in quiet areas free from distraction.
Once your dog becomes proficient at the exercise, you can introduce progressively bigger distractions. Do not put your dog in a situation for which he is not ready. At a busy park, for example, your dog may be capable of remaining sitting by your side, but he may not be ready to Come Back When Called from a distance. If you doubt that your dog will come toward you the first time you ask, give him the command and gently guide him with the long line.
Once he decides to move in your direction, click, back up and praise him. Keep a long line on your dog when in large, open areas as a safety measure. If your dog chooses not to respond, pick up the end of the line and help him make the correct decision. Do not allow your dog to learn that Come does not always mean come back when called.
1. Hold the end of your long line and Training Clicker in one hand, and a treat in the other. Do not show your dog the treat.
2. Allow your dog to become distracted and to wander approximately 10 feet away.
3. Make your leash loose and give your dog the command "Come." Help him with the long line if necessary.
4. The moment he moves toward you, click and back away, reeling in the long line as you do so.
5. Your backward movement will encourage your dog to continue to come toward you. Praise your dog using an upbeat tone as you do so.
6. When your dog reaches you, stop moving and reward him with the treat. Follow the reward with praise.
7. Release your dog, but do not let go of the long line. Repeat the above steps 10 times.
8. Practice these steps in each training session, but allow your dog to gradually wander farther from you with each session, until he is 20-30 feet away, depending on the length of your long line.
13. STAND for BASIC GROOMING Teaching your dog to stand for basic grooming is useful for brushing and cleaning ears. It also makes your dog more manageable for the veterinarian. Once your dog is capable of a 30 second Stand, begin to "handle" him by running your hand down his neck and back and examining his paws and ears. Click, reward and release your dog for remaining in position for just a few seconds. Gradually increase the length of time your dog remains in position until you can fully examine him. Once you can fully examine your dog, begin to brush him while he is in the stand position. Use the same gradual approach until you can brush your dog with ease.
1. With your dog at your left side, give the Sit command.
2. Hold a treat in your right hand and slightly in front of your dog's nose.
3. Slowly move the treat away from your dog in a direction that is parallel to the ground. Be sure that your hand movement is slow enough so that your dog can follow the treat.
4. Place your left hand under your dog to help guide him into position and to keep him stable.
5. The moment your dog is standing, click, reward and release him.
6. Repeat the above steps 15 times.
7. Gradually delay your click, reward and release until the dog remains standing for 30 seconds.
8. Once your dog begins to understand, you may begin to add the command "Stand" the moment he is in the standing position. Click and reward your dog for standing.
9. Do not allow your dog to move his feet once standing. If he does, repeat the above steps until you reach the desired time goal.
14. SIT AT DOORS These exercises help develop good manners while preventing unruly behavior such as jumping or excessive excitement. Practice Sit at doors in different locations, and going both indoors and outdoors. Return to your dog occasionally and click, reward and release him as you stand next to him. This will prevent your dog from anticipating your release and your permission to enter or exit through the door.
1. With your dog on leash and at your left side, walk to the front door of your home.
2. Stop 2 to 3 feet from the door. Give the Sit command.
3. Repeat the command and open the door. Watch your dog as you do so.
4. Continue to watch him as you step through the doorway.
5. Stand facing your dog, wait 5 seconds, then click, reward and release him.
6. Invite your dog through the door and reward him with a treat as he does so.
7. If your dog breaks the Sit position before you click, reward and release, repeat the above steps.
8. Perform 5 repetitions of the above steps in each direction through the door, for a total of 10 repetitions.
9. Add several seconds to each training session until your dog can remain sitting at a door for 30 seconds.
15. WAIT TO LOAD The purpose of this exercise is to teach your dog to get in and out of your vehicle peacefully and only with your permission. The Load exercise breaks down into four parts: the Sit at the vehicle, the Load into the vehicle, remaining in the vehicle and the release from the vehicle back into the Sit position. Initially, click, reward and release your dog for each phase of the exercise. Ultimately, you will click, release and reward your dog only when he completes all four phases. This is known as chaining. You can and should practice the four aspects of the exercise separately and then chain them together. Caution should be used when asking a dog to jump up onto or down from high surfaces.
It is recommended that dogs young and old either use a safety ramp or be safely lifted.When you practice an exercise for an extended period, you may offer your dog a bite-sized treat. For example, if your dog is peacefully waiting in your vehicle, you may offer him a treat before you click, reward and release. Expect your dog to remain calm and mannerly whenever he exits your vehicle. Another useful Wait exercise is to teach your dog to Wait before going through a gate, up stairs and more.
1. With your dog on leash and at your left side, walk to the door of the vehicle that you want your dog to use.
2. Stop 2 to 3 feet in front of the door. Give your dog the Sit command.
3. Repeat the Sit command and open the door. Watch your dog as you do so.
4. Wait 5 seconds, then click and release your dog. Encourage him to "Load." Reward him once he is in the vehicle.
5. With your dog in the vehicle, close the door.
6. Wait 5 seconds, and then open the door. Do not allow your dog to get out of the vehicle. If he does, repeat the command "Load," helping him back into the vehicle if necessary. Do not click or reward your dog if he breaks the command.
7. Wait 5 seconds, then click, reward and release your dog.
8. Repeat the Sit command once he has exited the vehicle.
9. Wait 5 seconds, then click, reward and release your dog.
10. Perform 5 repetitions of the above steps.
11. If your dog breaks the Sit position before you click and release, repeat the above steps.
12. Gradually extend the duration of time you expect your dog to remain sitting or in the load position until he can remain in each position of the exercise for 1 minute, for a total of 3 minutes.
16. SIT FOR GREETINGS Many dogs become excited at the opportunity to greet or be greeted by people. Whether it is someone they know or a friendly stranger, jumping up or other rowdy behavior can be replaced with a dog that sits calmly for greetings. If your dog seems too excited to remain sitting for greetings with petting, have your friend say hello to you from a distance. Once your dog is settled into the Sit position, your friend can move closer. With practice, your dog will be able to Sit peacefully for greetings. Practice this exercise at the front door of your home, on walks and at any other time that allows you to show your dog how to accept greetings by sitting.
1. With your dog on the leash and at your left side, approach someone who is familiar to your dog.
2. When you meet, give your dog the Sit command. Reward your dog with a treat for sitting quietly. Then exchange greetings.
3. Next have the other person calmly praise and pet your dog under his chin or near his shoulder. Your dog should remain sitting. Reward your dog with a treat.
4. Have your friend say goodbye and walk away. Your dog should remain sitting.
5. Wait 5 seconds, then click, reward and release your dog.
6. If your dog breaks his Sit command while your friend is greeting him, your friend should immediately ignore him by standing upright and looking away. Repeat steps 1-3 until your dog successfully completes them.
7. Repeat the above steps 5 times.
17. PLACE WHEN THE DOOR BELL RINGS Most dogs will bark and run to the door when they hear the doorbell or a knock. While many dog owners do not mind being alerted, barking at the door can be a nuisance if it is excessive. Teaching your dog to go to his Place when the doorbell rings alerts you to a visitor, while preventing nuisance or embarrassing behavior. This is a great way to keep your dog polite and mannerly when you are entertaining. Keep your dog on his Place for several minutes. When he is settled, ask your guests to go to your dog to greet him. Click, reward and release your dog when he has politely accepted the greetings. Repeat for each arriving guest. With practice, your dog will identify his Place as the most enjoyable spot to be when there is a lot of activity in your home.
1. Move your dog's Place 10 feet from the front door of your home.
2. Give the command "Place."
3. Have a friend or family member ring the doorbell. Your dog should remain on his Place.
4. Go to the door and greet your guest. Watch your dog the entire time.
5. If your dog gets up from his Place, return him to his Place, helping him with the leash if necessary.
6. Wait 30 seconds, then click, reward and release your dog for remaining in the Place position.
7. Have your friend leave. Remain with your dog in the vicinity of the door, and allow him to do as he pleases.
8. First have your friend ring the doorbell. Then give the Place command, helping your dog with the leash if necessary.
9. Repeat steps 4-7 for 5 times.
10. Gradually move your dog's Place farther from the door until it is in the area where you usually keep it.
18. THE SPIN Initially, it may be easier to lure your dog forward with the treat hand to get him started into the spin movement. You also can use the leash to guide him into the counter-clockwise direction, if necessary. Fade luring your dog around in a spin. Gradually move your hand further and further away from your dog's nose until you are standing upright.
1. With your dog standing in front of you, hold a bite-sized treat 2 inches in front of his nose.
2. Slowly move your treat hand in a counter-clockwise motion, encouraging your dog to follow the treat.
3. When your dog has completed a half-circle motion, click, reward and release him.
4. Repeat steps 1-3, but click, reward and release him when he does 3/4 of a circle.
5. Repeat steps 1-3, but click, reward and release when he does 1 full circle.
6. Add the command "Spin" when your dog completes 1 full turn, then click, reward and release him.
7. Gradually increase the number of spins over several training sessions, until your dog will follow your treat hand for as many as three spins. Give the Spin command for each turn, but do not click, reward and release until he completes the desired number of spins.
19. SHAKE Some dogs are naturally inclined to offer their paws without assistance. If you notice this behavior in your dog, capture it by clicking and rewarding him each time he does so.
1. With your dog standing in front of you, give him the Sit command.
2. Use either hand to raise either paw, click and reward your dog. Keep your dog in the Sit position.
3. Repeat the above steps 15 times.
4. When your dog begins to lift his paw off the ground without assistance, immediately click and reward him. Any voluntary movement of his paw is sufficient.
5. Gradually expect your dog to lift his paw into your extended hand before you click and reward him.
6. Once your dog fully offers his paw to your extended hand, add the command "Shake," then click and reward your dog.
20. PLAY DEAD Playing Dead is a trick for dogs that enjoy rolling onto their back. However, because this is a naturally submissive posture, some dogs may not enjoy playing dead. While all healthy dogs should learn all of the basic obedience commands in this guide, do not attempt to teach your dog a trick unless he enjoys performing it.
1. With your dog in front of you, give him the Down command.
2. Gently rest him on his side and immediately click and reward him.
3. Release your dog and return him to the Down position.
4. Repeat the above steps until your dog voluntarily rests on his side.
5. From the Down position, gently roll your dog onto his back and immediately click and reward him.
6. Return your dog to the Down position.
7. Repeat steps 5 and 6, until your dog rolls onto his back voluntarily. This may take several training sessions.
8. Once your dog begins to offer to roll onto his back, pair the action with a command "Play Dead" or "Bang" - then immediately click and reward him.
9. As your dog becomes eager to perform the exercise, begin the exercise directly from the sit or stand positions. Ultimately, you should be able to give your dog the "Play Dead" or "Bang" command from the sitting or standing position. Click and reward your dog the moment he performs the trick.
21. SIT UP This exercise requires strength and balance from your dog. Take your time teaching this exercise to ensure that your dog is physically capable of performing it. Initially, it may be easier to practice this exercise with your dog sitting in a corner, which will minimize the opportunity for him to fully get up and may allow him to learn the trick faster. In training Sit Up, you may be using several techniques at any one time. The hand above your dog's nose acts as a gestural prompt that encourages your dog into position. The treat in your hand acts as a lure. Shaping occurs when you click and reward for each closer approximation of the desired behavior. Capturing takes place when you click for a behavior that the dog offered on his own.
1. With your dog in front of you, give the Sit command.
2. Hold a treat directly above your dog's nose but out of reach.
3. Entice him to follow your treat hand as you move it directly upward.
4. As soon as you notice any attempt by your dog to have his front paws lift from the ground, immediately click, reward and release him. Do not click and reward if his rear end comes off the ground.
5. Gradually expect your dog to lift his front paws higher off the ground until he sits up fully.
6. Once your dog fully sits up, use the command "Sit Up" as soon as he is in the correct position, then immediately click, reward and release him.
7. Gradually delay the click, reward and release until your dog can Sit Up for 5 seconds.
23 TRICKS FOR YOUR DOG: CLICKER TRAINING TECHNIQUES This article is proudly presented by WWW.THECOLLIENOIS.COM and Samayo
1. Teach your dog to respond to your Clicker The first thing you need to do is make your dog familiar with a clicker. As it will be a new thing, you will have to work on making your dog know the sound of your clicker. To teach your dog how to respond to the clicker in the following steps:
1. Begin in a relaxing environment, there should be no distractions.
2. Now, click your clicker and give him a treat
3. Repeat it several times a day after a certain period
4. Test your dog by clicking when he is not paying attention
5. If he responds, give him a double treat!
2. Teach your dog how to Heel Heel in dog training means that your dog walks beside you, not behind you or in front of you. He should have the same pace as of your walking. You can teach your dog to heel by following the mentioned down below steps.
2. Pull him towards yourself when he tries to go to another direction
3. Now click and give him a treat
4. Start walking and click then treat
5. Click and treat after every few steps
6. Repeat this four to five times a day
7. Increase your walk once he has started to learn how to heel
3. Teach your dog to Fetch Fetch is very common while playing with your dog. In this, you throw an object, and your dog runs like the wind to catch that object and bring it back to you. If you want to clicker train your dog for fetching, follow the mentioned below steps.
5. Make small toss and when your dog catches the toy, treat him
6. Start making small throws. Click and then treat on retrieving
7. Repeat and make bigger throws once he learns
4. Teach your dog to Roll Over Rolling over is one of the cutest dog tricks. Your heart just melts away when your furball rolls over. If you want to melt your heart or train your dog to roll over using a clicker, follow the mentioned steps down below.
2. While he is still lying down, click, let him take a turn and give him a treat
3. Practice on both sides while clicking and treating
4. Make him follow the food while lying, from one side to the other and treat him
5. Repeat and repeat several times
6. Then make him roll faster with faster hand movements holding your treat
7. Keep away the treat and make him roll over with your hand movement
8. Once he rolls over completely, give him a treat
5. Teach your dog to Release A release is a dog trick in which you make your dog let go of anything he is holding in his mouth. He might be holding your favorite t-shirt, and you want it back. If you want to teach him with a clicker, follow the mentioned steps
2. Click and treat to let him know you will be offering him treats
3. Hold the treat in your hand and not let him give it until he barks
4. If your dog tries to get the treat by leaning over you, do not offer him treat
5. Make him sit and hold the treat in your hand
6. To want the treat, your dog will speak. Then let him have the treat
7. Repeat this several times
7. Teach your dog to Shake his Paws Do not we love when dogs shake their paws? They look so adorable! If you want your dog to look adorable while shaking his paws, the following are some steps which will make him learn with a clicker.
3. Now make him move in a circle, click and then treat
4. Repeat, click and treat
5. Now just do your hand movement to let him know he has to spin in a circle
6. Once he learns the hand movement, give him a generous treat
9. Teach your dog to give a Kiss We all want to be loved back, right? Especially from our dog! If you want your dog to kiss you back as you do, follow the mentioned down below steps to teach him
1. First, take some peanut butter and put some on your finger, then click
2. Let him eat the peanut butter from your finger
3. Now put little peanut butter on your cheeks and let him lick it from your face
4. Once your dog gets used to it, bring your face closer to him, without peanut butter on your face. He will know what you are asking for
5. Click, let him kiss you and then give him a treat
10. Teach your dog to Eliminate on Command The one thing we all are worried about is your dog eliminating. You do not want his to do "that" on your couch, making it stinky and smelly! To teach your dog to eliminate on command, follow the below-mentioned steps
1. First, decide a place where you want him to poo or pee
2. Observe when he usually eliminates. Note the time
3. When he needs to go, take him to the eliminating spot you decided
4. Click and say Eliminate
5. Once he eliminates, give him treat
6. Practice this daily. He will know where to and when to eliminate
11. Teach your dog how to Play Dead It is fun when your dog plays dead. It is one of the most common and fun dog tricks. If you want to make him learn to play dead, follow the steps as mentioned below
2. Click and use your treat to make him come in play dead position
3. Once he gets in play dead position, give him the treat
4. Repeat this, do not let him move once he comes into play dead position
5. Click and see does he plays dead or not. Also, use the wordplay dead over and over so he becomes familiar with the command
6. Practice and only give him treat once he plays dead
12. Teach your dog to Ignore or Leave something Your dog might be too active and fond of paying attention to everything. Sometimes you want your dog to leave or ignore a thing. Do make him learn this, follow the steps mentioned below.
1. Put a treat in front of him and click
2. When he comes to get the treat, say the command "leave it" and put your hand over the treatment to stop him to get it
3. Wait and do not move your hand until he stops
4. When he stops, let him have the treat
5. He will know that he will get a reward on not trying to get a thing
6. Repeat until you do not have to put your hand over the treat
7. Test him often by putting an object and saying the command "leave it"
8. Once he learns to ignore, treat him well
13. Teach your dog to Bark on Command Sometimes you need your buddy to bark on someone or something. It could be for fun or for your safety. In any case, to make him bark on command, follow the steps mentioned down below.
1. Hold a treat in your hand and do not make him have it
2. Use a clicker and say the command bark
3. Wait until he barks
4. Give him treat on barking
5. Repeat and keep saying the command "bark" so he gets familiar with it
6. Once he learns, give him a good treat
7. Test this command often
14. Teach your dog to Sit Pretty One of the very cool dog tricks is to make your buddy sit in a pretty style. If you want your pal to learn this trick, follow the steps mentioned below
3. Say the command "sit pretty" and hold the treat a little higher
4. Once your dog gets a little higher, give him the treat
5. Repeat it so your dog becomes familiar with the command "sit pretty"
6. Wait until your dog lifts his front feet off the ground
7. Only give him treat once he lifts his front feet
8. Repeat until he sits pretty without a treat
15. Teach your dog to Look at Your Eyes It would be pretty cool if your dog can look in your eyes. His eyes will warm your heart. It will give you and your dog a moment of stronger connection through eye contact. So make your dog learn this trick, follow the mentioned steps
3. Do not make him eat the treat until he looks at you
4. Once he looks at you, give him the treat
5. Repeat these steps
6. Now practice this in a place with distractions to see how much he has learned
7. Hold the treat in your hands until he makes eye contact for a longer time
8. Repeat until he learns to do without a treat
16. Teach your dog How to Wait To make your dog wait is a helpful command. Your dog should know this one. With wait command, release command goes hand in hand. To make him learn how to wait, follow the mentioned down below
1. Make your dog sit
2. Click and hold a treat in your hand
3. Show the treat to your dog and do not let him take it
4. Pull your hand way when your dog tries to get it
5. Repeat until he stops trying to get the treat when you show him
6. Once he stops, give him the treat
7. Now practice with using the word command "wait" to make him familiar
8. Increase the distance and put the treat on the ground and say "wait"
9. When he waits, then release him and let him eat the treat
10. Repeat several times a day
17. Teach your dog to Bring you Things Your dog can be handy when you want something and are too lazy to get up to get it. Train your dog with the following steps to bring you things
1. First, you need to make him familiar with things that you would want to bring him for you
2. Show him your things again and toss them. It will make them excited
3. Now put your desired object on the ground and point towards it
4. Click and give him the command bring (object name)
5. Make him pick up the object
6. Once he picks up, treat him well
7. Now once he has learned to pick up, now you have to make him bring it to you
8. Show him treat in your hand and he will come to you with the object
9. Once he comes, take the object and give him treat
10. Now do this by clicking, and saying the command "retrieve"
11. Repeat the whole procedure over and over again
12. Once he learns how to bring you things, practice it again
18. Teach your dog to Come When Called Our dog might be in another room when you want him. You want to call him to come to you. To make him learn this dog trick, you can take help from the following steps.
1. Choose your word command to call him like "(dog's name) come here"
2. Use his name more often in front of him to make him know what he is called
3. Use a long leash and go out to practice it
4. Move ten steps back from your dog
5. Click and show him treat
6. While showing the treat use your command
7. Practice it with greater distance
8. Gently tug the leash towards you in greater distance and say the command
9. This way he will learn to come towards you when he hears the come command
10. Practice this in your home while keeping your dog in another room and yourself in other
19. Teach your dog to Balance Treat on his Nose It is fun to see your dog balance his treat on his nose. This will entertain you and your buddy as well. At the beginning is a little tricky, but he will learn anyway. To make him balance a treat on his nose, follow the mentioned steps down below
2. Click and give him treat by lowering your hand at ground level
3. Move back a little and make him come towards you in a lowered position
4. Repeat by saying the command "crawl"
5. Practice it regularly
6. He will start crawling. Now tell him to crawl and show your hand without the treat
21. Teach your dog Go To Bed You might have bought his special bed, but he does not sleep in it. You can make him go to bed easily by following simple steps as mentioned below
2. Click and treat him while moving your hand towards the bed. He will eat the treat on his bed
3. Use the word command "Go to bed" while doing so
4. Keep pointing him towards the bed and treat him when he reaches his bed
5. Do it without the treat. Command him by pointing towards the bed and saying the command go to bed
6. Once he has learned where you are pointing, test him by just saying the command go to bed
7. If he obeys, offer him his treat
8. Put him in another room, far from his bed
9. Give the command "go to bed" and see if he comes
10. Treat him when he comes from another room
22. Teach your dog to Give you a Hi-Five Giving your dog a hi-five is cool enough to make him learn this dog trick. It is simple and easy to do by following the steps mentioned down below
2. Click and show him treat and hold his paw over slightly while giving him the treat
3. Keep repeating the process and increase the height of lifting his paw while giving him treat
4. Lure him with a treat and see if he holds up his paw
5. If yes, then treat him
6. Now reach out to him and hold his paw for a few seconds when he holds it up
7. After holding for a few seconds, let him have the treat
8. Now put your hand in a high-five position and let him reach out to your hand
9. Continue the practice and treat him once he obeys you
23. Teach your dog to Hold an Object Sometimes it is handy to use your dog to carry things. You can easily make your dog hold an object by following simple steps
Looking for a way to train your puppy using positive reinforcement? Then puppy clicker training might be right for you. Puppy clicker training is a common and effective method of training which enables us to mark desirable behaviour. The clicker is a very simple device which makes a little click when you press it. It is an effective tool that can help with house training puppies, managing unwanted puppy behavior, and keeping your dog safe. Most importantly, be sure to have fun with it. Using a dog clicker can be a bonding experience that deepens your relationship with your puppy.
Introducing the Clicker A key thing to remember when clicker training your puppy is that click = food. Before you start to clicker train, test clickers in a store to ensure they are not too loud for your dog. To begin puppy clicker training, hold the treat in your hand and put it next to your dog’s mouth while clicking so that the dog associates this sound with food. Nothing is being asked of the dog in these first stages, just a click and a treat. You should do this gradually over a few days.
Clicker Training a Puppy Once you have introduced the clicker, you can start to ask commands. For example, ask your dog to "Sit" and once they perform the desired behaviour, click and treat. You can do this with other commands such as down, again only clicking when your dog reaches the position being asked of him. Always be patient and wait for the precise position, then click and treat. You can also try to ask your dog to stay, and click after a few seconds as well as rewarding him with food. Top tip: Do not repeat the command endlessly, just one clear command.
When to Start Clicker Training a Puppy? You can start to train your puppy as early as eight weeks, however you should note that the time it takes to train your puppy could depend on their age, temperament, gender and breed. It is important to not get frustrated if your puppy is not learning the commands as quickly as you hoped, for it is all about repetition and patience. Rely on the positive reinforcement of the clicker and treat and eventually, your puppy will begin to pick things up.
When to Stop Clicker Training? The clicker is here to primarily introduce a new behaviour in the early stages. It is a good way to help you install these desirable behaviours in your puppy. Once the behaviours are there, and the dog is performing nicely and promptly to your commands, you can begin to reduce clicker training. You can also reduce how much you feed your dog after every command as the dog will be willing to do it for you. Perhaps feed the dog every third command it carries out, and then fifth time, and so on. You can allow treats to become less frequent until you are not really walking your dog with food at all – although, the occasional use of food is always handy!
1. Avoid Noisy Places Begin clicker training your puppy in a quiet area where there are few distractions. This way, your puppy will be better able to focus and hear the clicking noise.
2. Do not Train on a Full Tummy Puppy clicker training should take place when you know your little furball has an appetite - not right after mealtime. If your puppy has a belly full of food, he or she may be tired and less interested in treat rewards.
3. Timing is Key Make sure you click while you are puppy is performing the task or behavior. If you are too early or too late, your puppy may have trouble associating the click with the behavior you are trying to teach.
4. Think about Snapping a Picture One way to help you get the timing down is to pretend you are taking a picture. Press the dog clicker the moment when you'd be able to capture a shot of your puppy in mid-action.
5. Start with Simple Behaviors It can be easier to get started with natural actions, like responding when you call your puppy's name. Click at the exact moment your puppy looks at you. From there, you can move on to other simple behaviors, like sitting or lying down.
6. Catch your Puppy in the Act If you see your puppy about to perform a behavior you have been working on, such as sitting or lying down, use the clicker and offer praise and a treat, if you have one handy. This can help reinforce the puppy clicker training process.
7. Nudge your Puppy Along Another way to help your puppy training progress is to lure your pooch into performing a behavior. For instance, gently nudge - never force, push, or pull your puppy into a sitting position with the clicker in your hand. When your puppy complies, click and offer a treat. If your puppy jumps back up, repeat the process.
8. Keep it Short to Start Puppies by nature have short attention spans, so keep clicker training practice brief at first, maybe 5 minutes or so. Puppies can learn a lot in short bursts because they are more interested and engaged. Long and boring clicker training sessions can be frustrating for both of you.
9. Only Click Once If you are especially proud of your puppy, you can offer an extra treat or more praise, but do not increase the number of clicks. This can confuse your puppy and slow down the clicker training process.
10. Click Good Behaviors You can click good behaviors to help teach your puppy the right way to do things and stop bad behaviors. For instance, if your puppy tends to pee on the carpet, give a click when he or she goes to the bathroom in an appropriate place. If your puppy jumps all over guests, click when paws remain on the floor when a visitor arrives.
11. Click for Partial Success You do not have to hold your click until your puppy gets it exactly right. You can click for small steps in the right direction. For example, if you tell your puppy to sit, and he or she begins to crouch down, click even if your puppy gets back up on all fours.
12. Take Breaks as Needed Puppy clicker training requires time and patience. If you or your puppy starts getting frustrated, put the clicker down for awhile. Avoid scolding or punishing your puppy while clicker training, since it can be confusing to mix in negative reinforcement. The clicker is all about reinforcing behaviors in a positive way.
AGRESSIVE DOG CLICKER TRAINING This material proudly presented by WWW.PETPLAN.CO.UK and Amy Feinstein
It is a common misconception that hostile dogs can not be trained using the clicker method. This is only partially true. There are many causes for aggressive behavior in dogs, but dogs with fear-based aggression should not be trained using a clicker. This is even more critical when it comes to dogs who are fearful of loud noises. Because a clicker makes a loud, sudden sound, your dog may see this as a threat rather than a signal.
However, other types of aggressive behavior can be stymied by clicker training, but do not be discouraged if your efforts at rehabilitation do not see immediate results. Aggressive dogs often have to re-learn how to react to the world around them, and Fienberg stresses that, A month or two of hard work will really pay off.
With constant positive reinforcement, you are creating a bond that will last for the rest of the dog's life. Through love and consistent clicker training, even the most hostile dogs can be rehabilitated. One of the most famous examples of aggression rehabilitation through clicker training is Leo, a pit bull rescued from Michael Vick's dogfighting ring.
When he was first rescued, Leo's prospects were not bright. As a trained fighter and killer, he knew little of love and even less about obedience. But after five weeks of intensive rehabilitation, which included clicker training, Leo was transformed into a sweet, lovable pooch who enjoys being around people.
Instead of fighting for his life, he now works as a therapy dog and wears a colorful clown collar while visiting cancer patients at the Camino Infusion Center in Mountain View, Calif. Leo is warm and gentle, and he brings joy and hope to those battling cancer. But none of it would have been possible without love, dedication and clicker training.
PetSafe Clik-R Trainer The PetSafe Clik-R Trainer comes with a positive dog raining guide to help make clicker training a breeze. PetSafe is a reputable dog brand that manufactures durable and high-quality pet products from dog doors, feeders, fountains and clickers. Customer care is available 6 days a week if you have questions even about dog training. PetSafe adds "Training with the clicker sound as a marker and following the sound with a treat reward is very effective. It is easy, the dogs and their owners both like the method and the learning success rate is high. Use clicker training for basic obedience commands to tricks and agility activities." What we like about this product is that it comes with a free introductory clicker training guide.
Good2Go Soft Dog Training Clicker Perfect for the noise sensitive dog that may react fearfully to loud clicks, the Good2Go Soft Dog Training Clicker features a finger strap for optimal use and comfort. As a powerful dog training tool, this clicker works well for basic obedience training. The comfortable finger strap allows for optimal focus on your dog while training.
StarMark Pro-Training Clicker for Dogs This clicker is comfortable to use, and has been tested for safety and health purposes. Made from vinyl and rubber, this clicker is rust proof and has a key chain or lanyard option for safe guarding. This product also offers a free clicker training guide to show first time pet parents how to clicker train effectively and in the right way. This clicker has a roundish shape for optimal hand snugness, and fits well between thumb and forefinger when clicker training. Offered in vibrant blue and orange, the Starmark clickers also features vinyl and rubber for comfort.
HOAoOO Pet Training Clicker with Wrist Strap This clicker features a large yellow button for easy clicking. It is ergonomically shaped, and functions well in outdoor weather. The HOAoOO pet training clicker is available in two colors and is easy to use. It also features a wristband with lanyard or keychain clip.
EcoCity Dog Training Clicker A brand new happy communication mode with the pet. Great for training puppies and young adult dogs! Fits nicely in your hand, it has elastic wrist strap so you do not drop it. Button presses easily and comes right back up without getting stuck, good sound, not to loud or soft. The Clicker can not only train the dog but also the cat, bird, chicken, sheep and even mouse.
Karen Pryor Clicker Training Terry Ryan Clik Stik All in one clicker and retractable target stick, Fully telescoping from 6 to 23 Inch, Can be used as clicker when rod is closed, Includes Terry Ryan's training guide.
Downtown Pet Supply Big Button Pet Training Clicker 4 pack big button clickers with wrist strap by downtown pet supply, Clicker training is a form of positive training, click and train, Easy to use clicker, fits in the palm of your hand, Big button for easy clicking and loud sound, Nice loud click, not for sensitive animals.
Karen Pryor i-Click Must-have training tool for sound-sensitive pets, Easy to use in any position, Small enough to hide in your palm, Activates with just a small amount of pressure, Designed by Karen Pryor Clicker Trainers.
LaZimnInc Dog Training Clicker This is a set of two clickers with an ergonomic design to fit perfectly in the palm of your hand and use comfortably in any position. Each clicker features sturdy metal construction that is resistant to rust and breakages. The clickers are black and white, and they each have a big button that presses easily and produces a loud but gentle clicking sound, making it ideal for training sensitive dogs. Each clicker has a wrist strap attached to it for safety and portability, but you can also attach it to your keychain or another lanyard. The clicker can also be used to train other animals including cats, birds, and mice.
Flightbird Training Clicker Kit This clicker training kit comes in a set of four clickers, each with a different color. The clickers have an ergonomic design that makes it comfortable to hold and use. Each clicker is built solidly to ensure it is durable and reliable; and it has a big button that is easy to press without it getting stuck. The clicker has sound holes that produce a loud noise but which will not scare or startle your dog. It has an elastic ring at the back to fit your finger firmly and an elastic wrist strap to ensure that the clicker stays in your hand; and this also provides portability. The kit is backed by a full guarantee of customer satisfaction.
The Company of Animals Clix This multi-purpose clicker is ideal for training sound sensitive dogs and puppies. The clicker is small and has an ergonomic design to fit comfortably in your hand. It has a patented volume control to allow you to choose how loud or how soft you want the clicking sound to be. The button is raised for easy use, and it presses with little pressure. The multi-clicker has an elastic band attached to it to ensure it stays in your hand at all times. It comes with a simple step by step guide which shows how to teach your dog new tricks. The clicker is well constructed to ensure that it lasts long through regular training sessions.
PetSmart Box Clicker The Patty Both Box Clicker (also available at PetSmart) is a metallic box clicker that emits a loud, piercing click that can be heard even at a distance outside. Owners who find most clickers too quiet are big fans of this box clicker. Loudest Click. This box clicker features a loud metallic click designed to be used even at a distance outdoors. Bulky Size. These clickers are on the bigger and bulkier side, which can make them a bit more work to hold, but they won't get lost and are powerful as a result. Durable. Many find metal box clickers to be more reliable and durable than plastic varieties. Keychain Attachment. Includes a metal keychain attachment that can be connected to a lanyard or other device.
CLICKER DOG TRAINING MISCONCEPTIONS This article is proudly presented by WWW.WHEN HOUNDSFLY.COM and WWW.ITSYOURDOG.COM and Andre Yeu
Clicker training is an exciting complement to training and a useful tool for instilling good behaviors. It can be used alongside traditional positive reinforcement training methods. It can also be used to help shape or train complicated behaviors by helping guide your dog in the right direction. However, there are some misconceptions about how to use a clicker when training. Read on to learn more about this great tool, and some of the common myths surrounding it!
Clicker training may seem complicated. It may even seem unneeded as owners can just use a praise word in place of a click. However, for those wanting to teach beyond the basics, a clicker is a great way to teach more complex behaviors without having to learn a new system of training. It is also a great way to keep your dog focused. It helps him learn he is doing the right thing with consistency.
MYTH: The Click Gives a Command Clickers are used to let your dog know they have completed a command with success, but they are not what tells your dog to do it. You can't click to have your dog sit, stay, lay down, etc. Instead, you will give your dog a command as usual, and once they have completed it, click and then give a treat. Clickers let your dog anticipate the upcoming reward.
MYTH: I have to carry a clicker with me at all times or else the dog won't perform Truth: Clickers are only used in the learning phase of a new behavior. After a behavior is nearly fluent, it is no longer needed.
MYTH: Clickers Can Be Used to Stop a Behavior Clickers don't give commands, or rewards, and they can't stop a behavior either. However, shaping new behaviors through clicker training can help deter and stop bad behaviors by shaping them into wanted ones. For example, a barking dog may be trained to bark on command instead, and thus bark less when a reward isn't involved.
MYTH: The Click is Used in Place of a Treat Clickers are also NOT the reward for the behavior, but the signal that a reward is coming. When starting out, owners and trainers will prime the clicker, by simply clicking it and giving a treat immediately after. This helps your dog associate the click with the upcoming reward, so when you use it for training he will understand he was successful.
MYTH: If I train with food, I will need to have food with me at all times, forever, or else the dog won't perform Lure-reward food-based training will create food dependency. Lure-reward training is not the same as clicker training, even though some lure-reward trainers use clickers incorrectly. Clicker trainers do not use food as a lure, or if they do, they use them extremely sparingly. If you train properly, you will not need to show your dog a treat first before it performs, nor will you necessarily have to feed your dog every time it performs. In fact, the opposite is true, if you continue to feed your dog for every correct response for too long, the dog won't perform reliably. Clicker training actually requires you adopt what we call a variable schedule of reinforcement - in plain English, phasing out food.
MYTH: Dogs get fat being trained with food Food rewards are prepared so small that they represent a relatively small percentage of total food intake per week. Also, in low-distraction environments or for easy behaviors, a dog's regular meal can be used for training. I have never met a clicker trained dog that was overweight - most are pretty svelte since they often compete in dog sports as their training progresses.
MYTH: If I train with food, the dog will beg for food Feeding your dog at the dinner table teaches them to beg at the dinner table. Giving food out by hand for no reason will teach a dog to beg for food. Training with food teaches the dog that food is only given in exchange for work performed, and only when we request the work. Well trained dogs actually never beg for food because the circumstances in which they can earn food is so black and white, they understand when it's not available and when it's available and that is on our terms.
MYTH: Clicker Trainers are "New Age-y" and "Soft" on their dogs False!!! The best clicker trainers are extremely hard on their dogs. We are hard on the criteria we require our dogs to perform to in order to earn reinforcement. We are stingy on keeping access to rewards and reinforcement contingent on performing behaviors. Since nobody wants to carry around food forever, myself included, I use everything else that the dog wants in life to reinforce training. If my dogs don't go into their crate and lay down, they don't eat. If they don't sit and stay while I open the door, the door never opens. If they don't keep the leash loose while we are walking towards the dog park, we never get to the dog park. What is true though is we will never use physical punishment in training because it is unnecessary - you can train reliable behaviors and proof them against distractions without having to inflict pain.
MYTH: The dog will hear clicks from other students in class and get confused Dogs are experts at discriminating. Only clicks that come from the handler result in a food reward, so dogs quickly learn to ignore clicks that come from other directions.
MYTH: Clicker training is a fad and it will be gone soon Clicker training comes from the work of B.F. Skinner and one of the earliest examples of clicker training was his graduate students, Marian and Keller Breland, clicker training pigeons to assist in aerial bombing in World War II. In the 1960s, Karen Pryor brought clicker training to dolphin training, and today it is now used to train practically every species of animal known to man. If it is good enough for the military and good enough for Sea World, is not it good enough for your family pet?
Dogica® collects only technical cookies. No any personal or private information being collected, saved or shared here. 3rd Party cookies could be collected by various installed widgets.
The information contained in or provided through DOGICA® site is intended for general consumer understanding and education only and is not intended to be and is not a substitute for professional advice.
Use of this site and any information contained on or provided through this site is provided on an "as is" basis without any representations, warranties or pay.

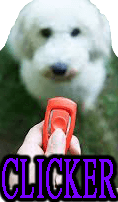


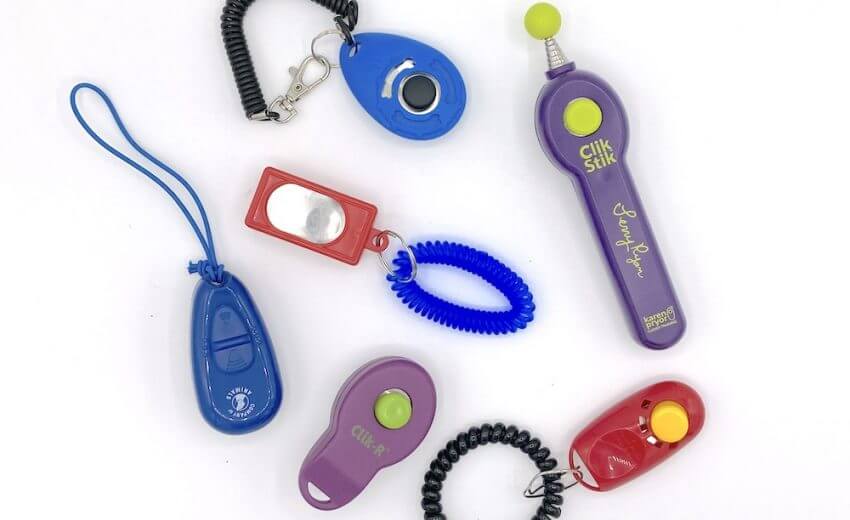
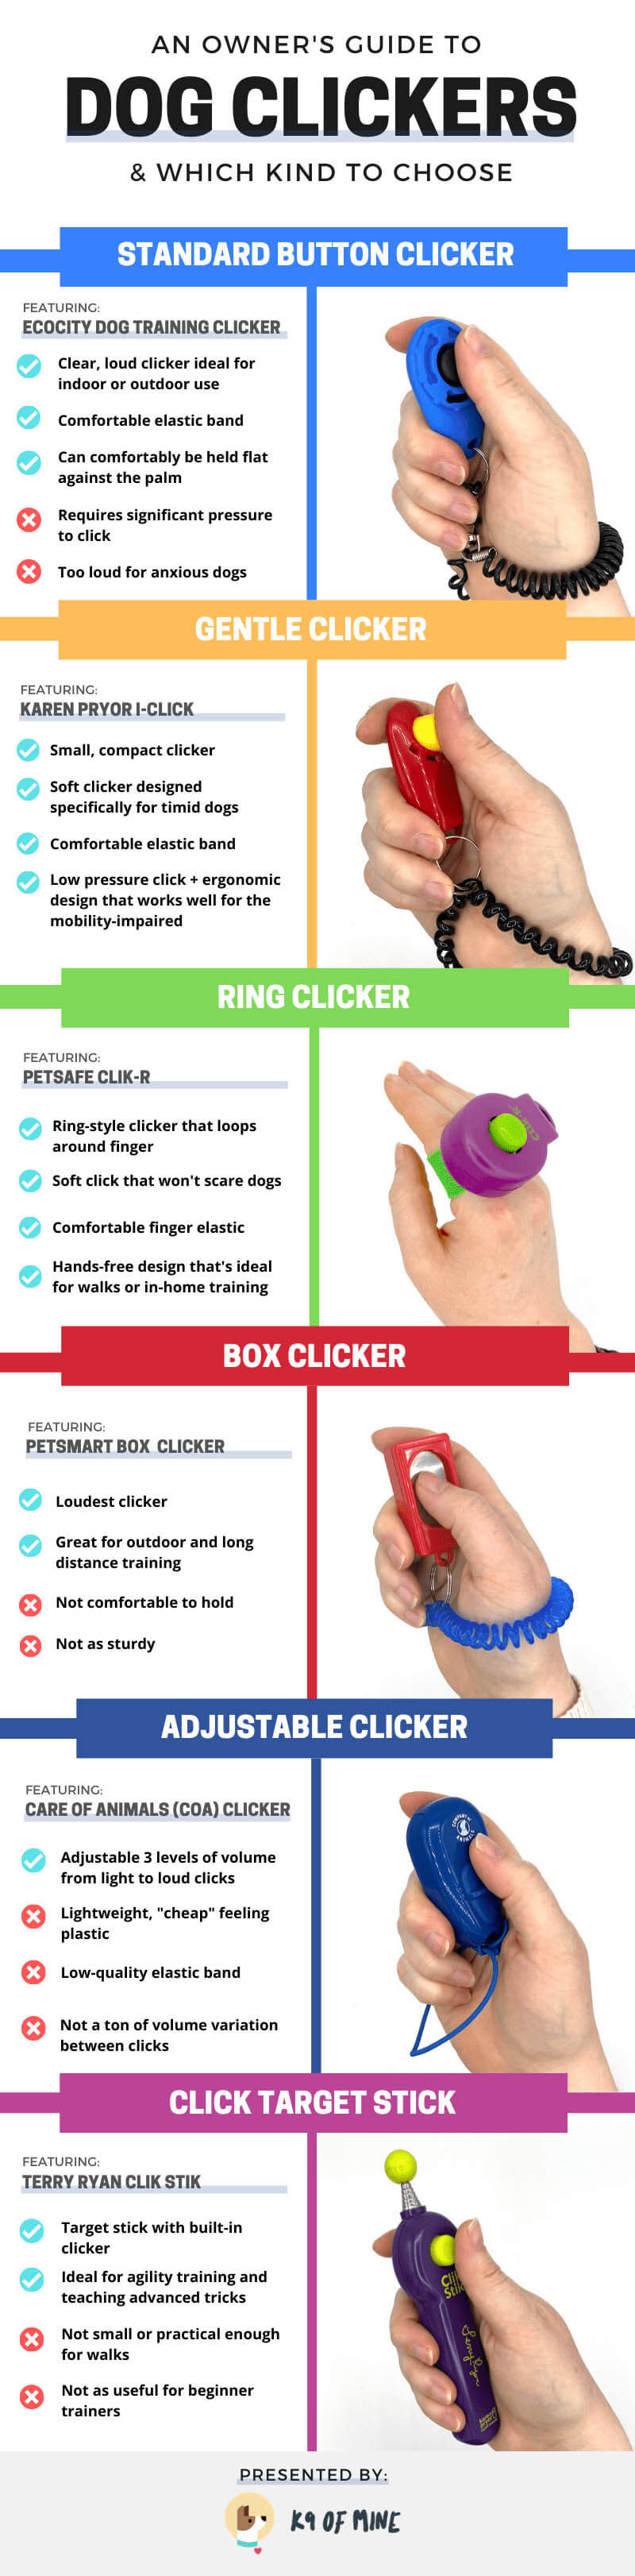


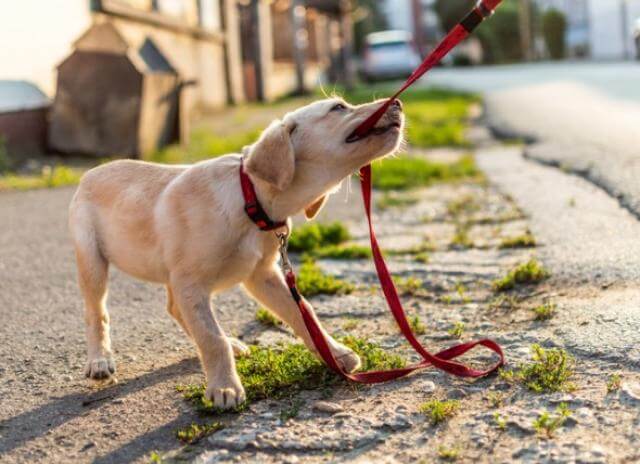
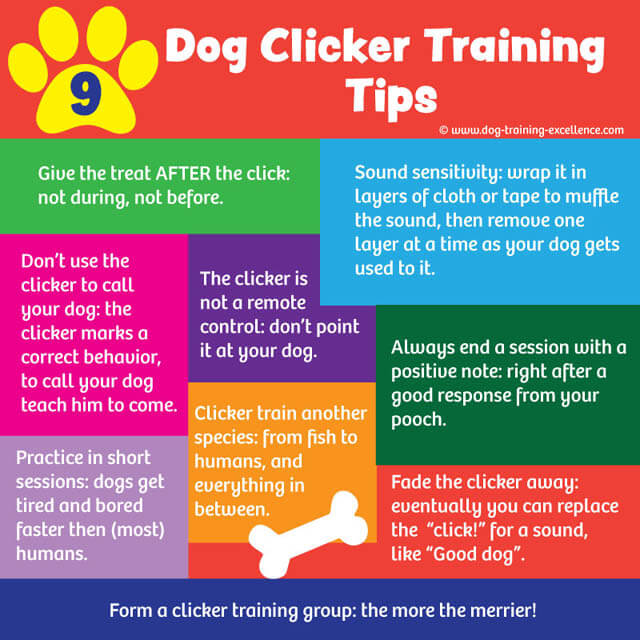
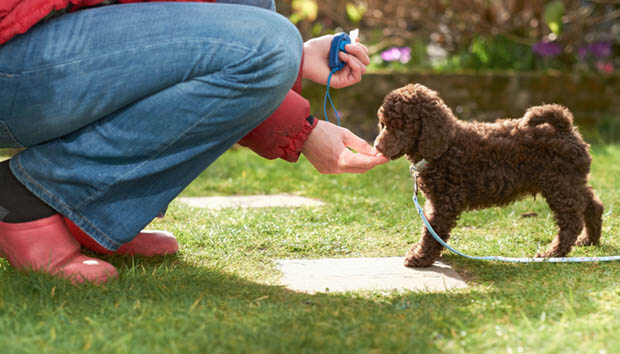
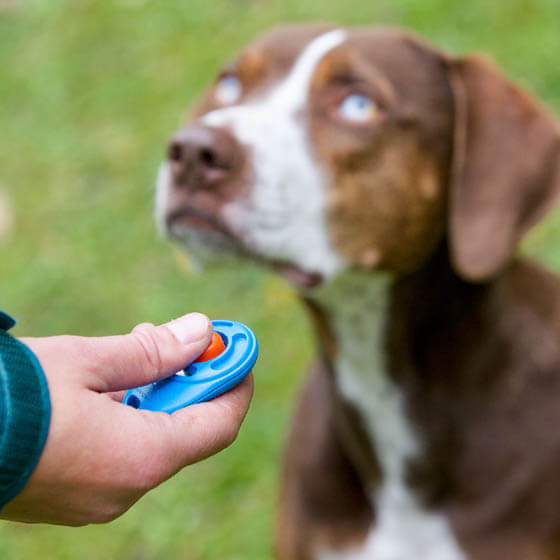
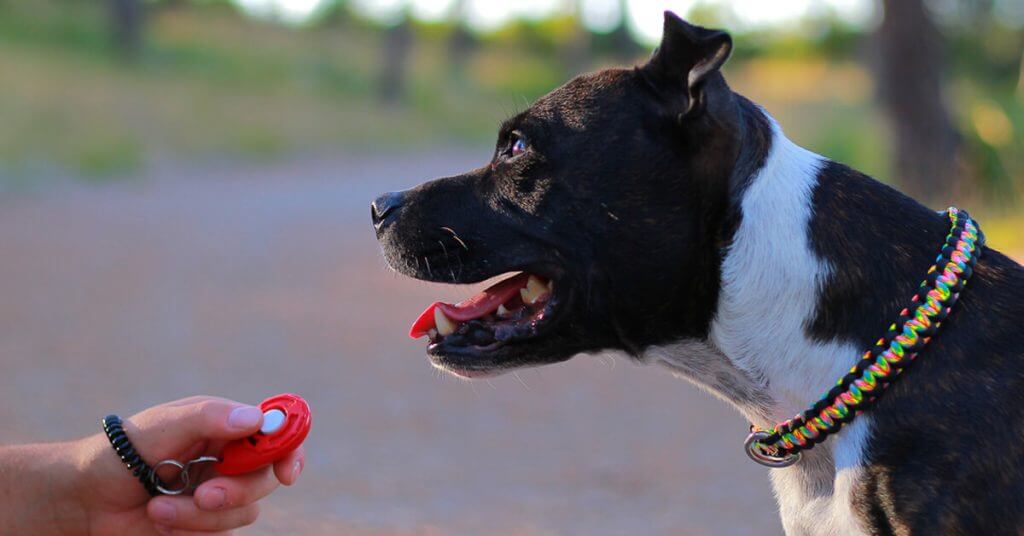
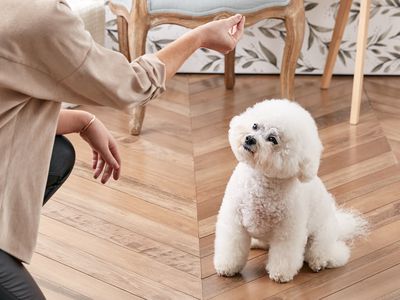
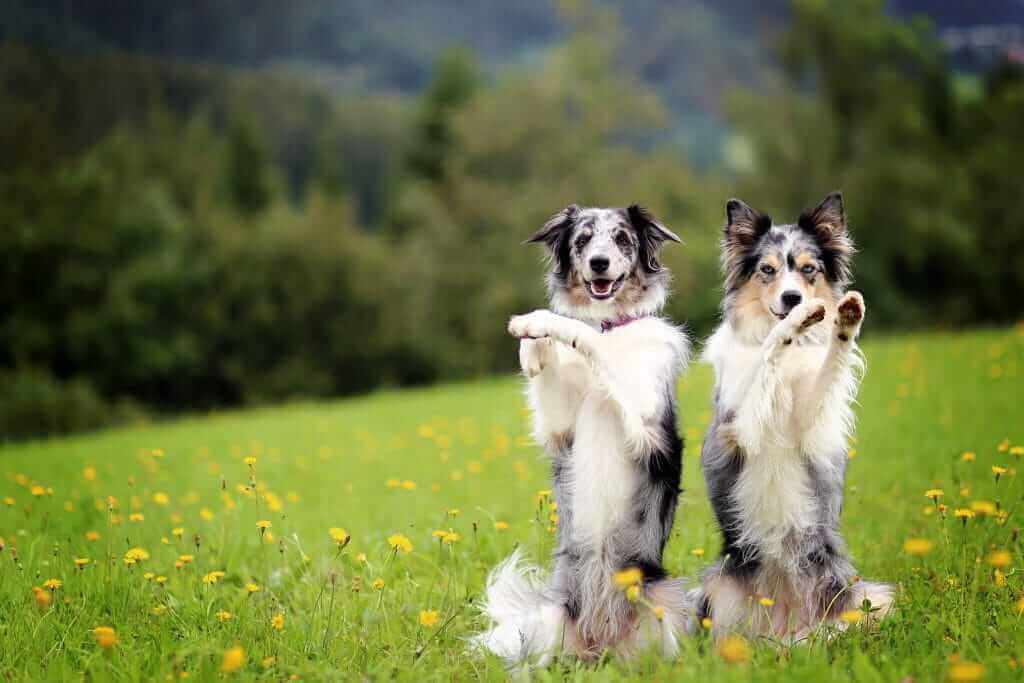
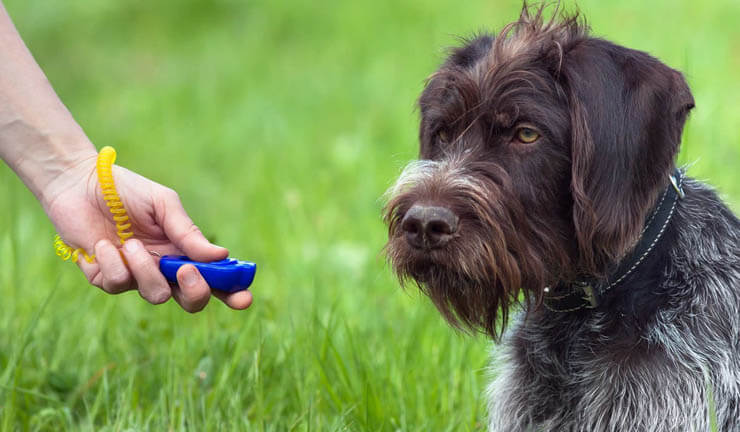
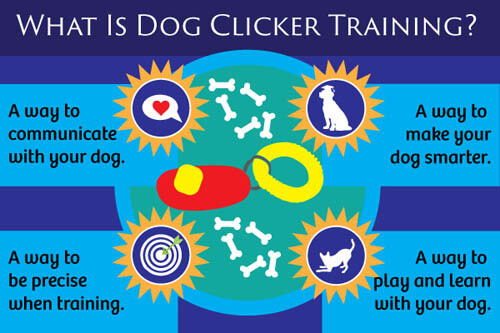
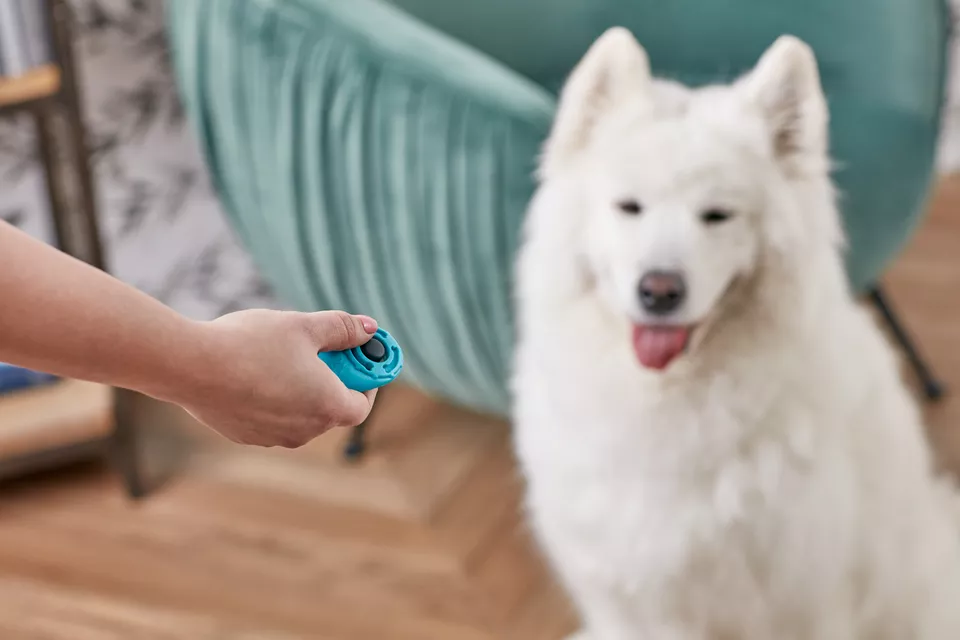
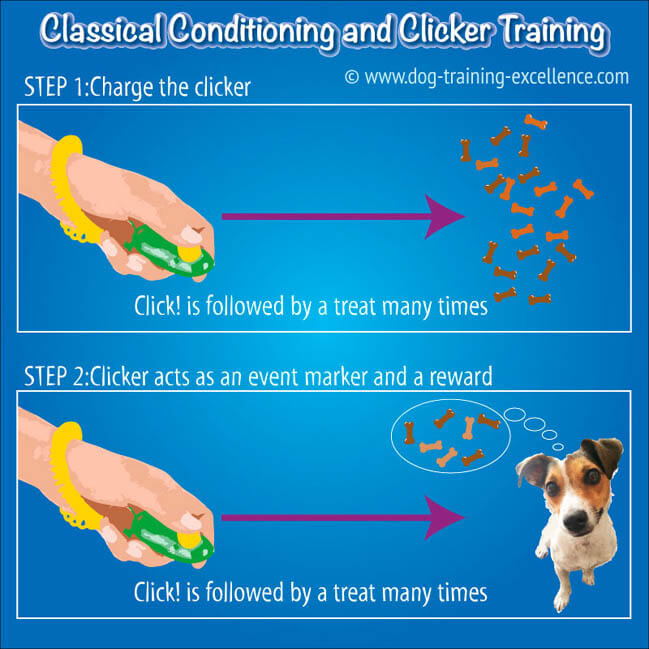

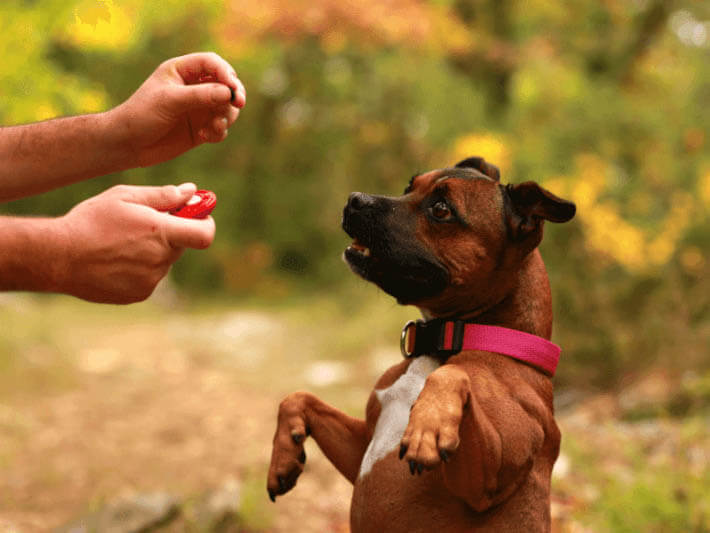
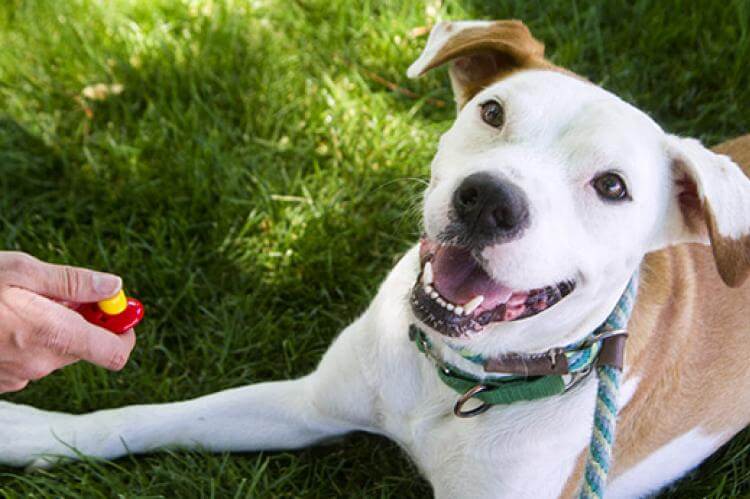
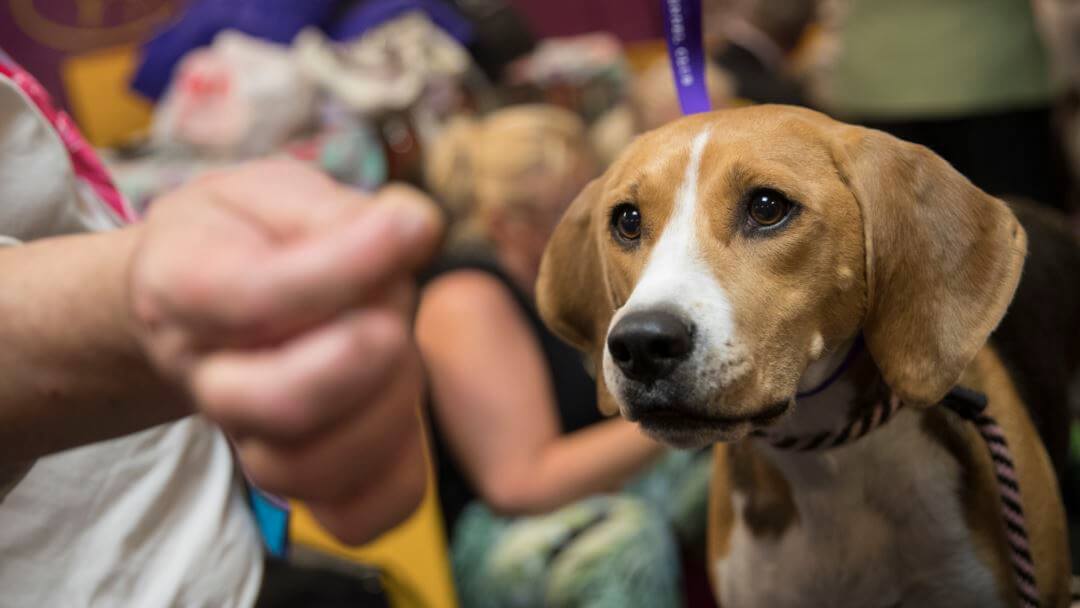
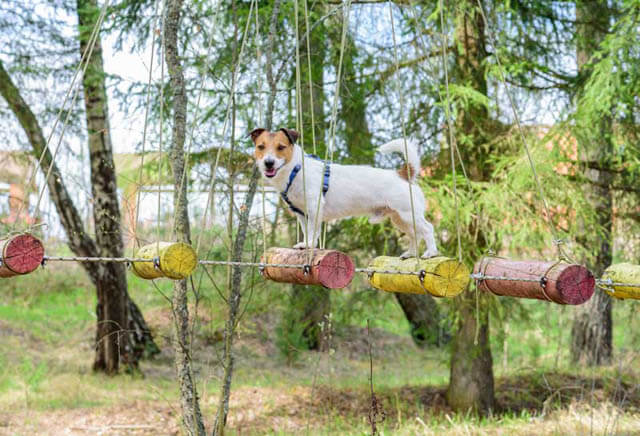
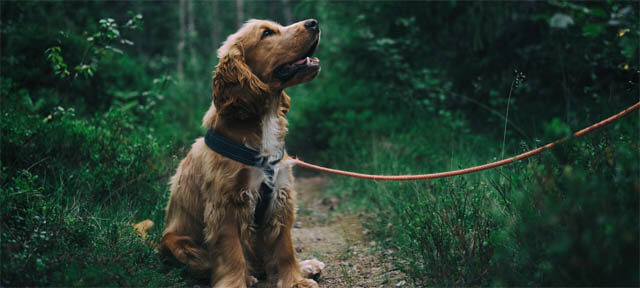
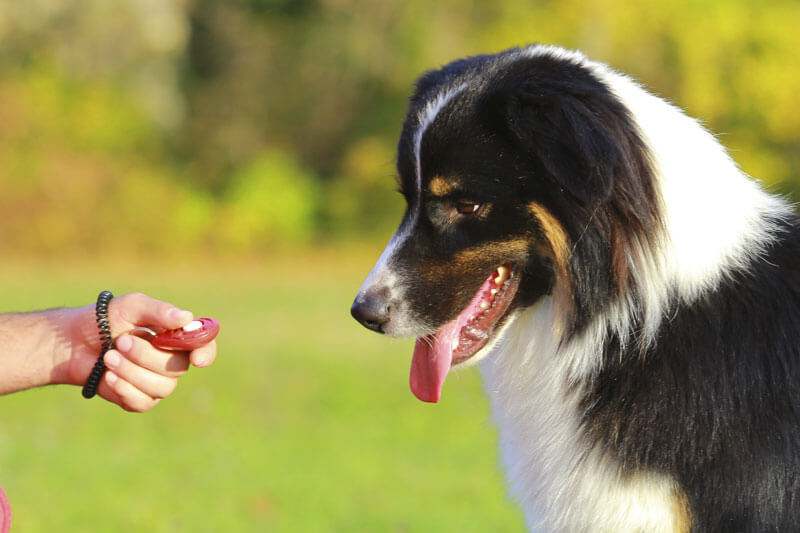
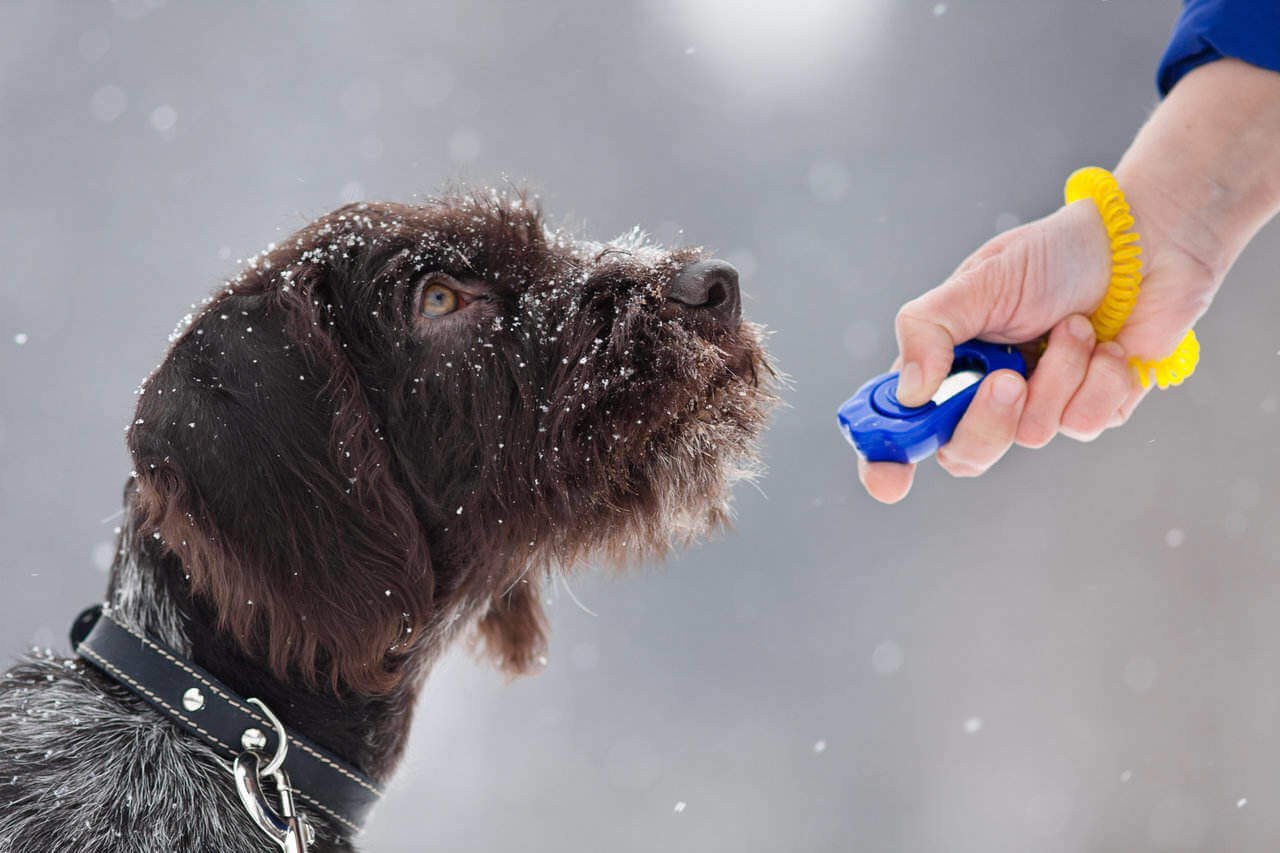
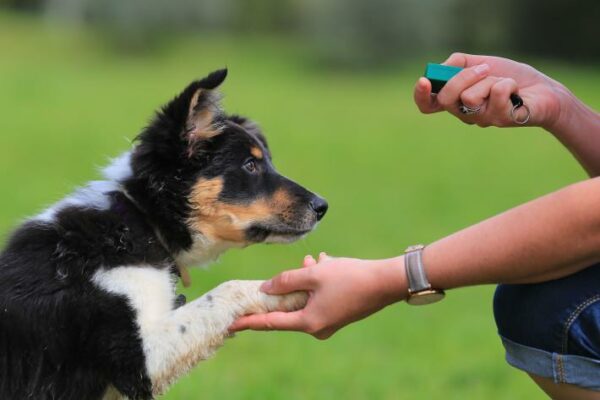

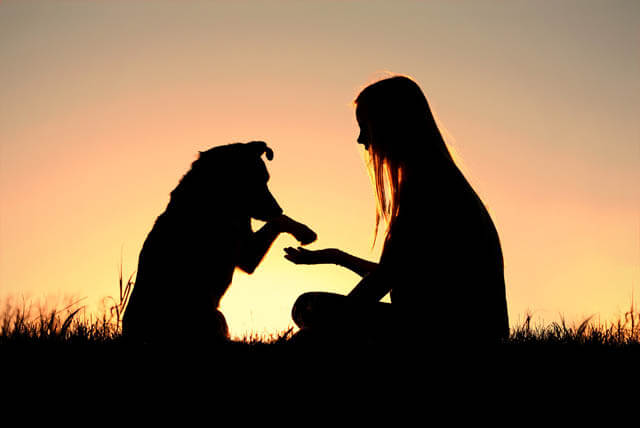
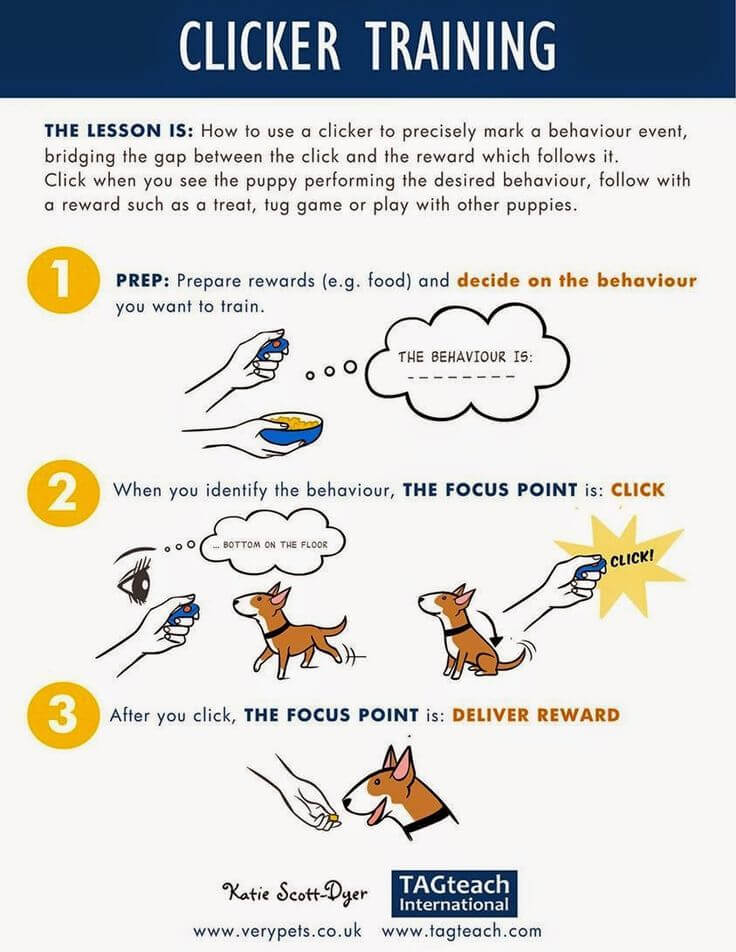


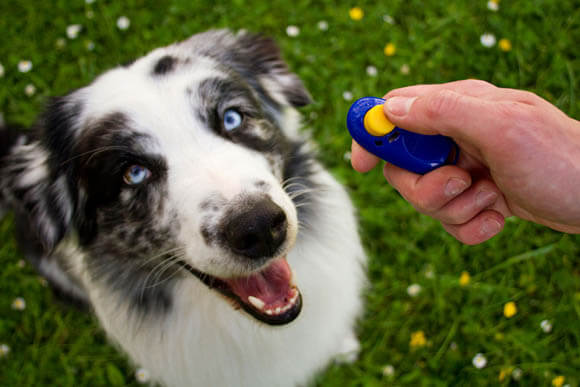
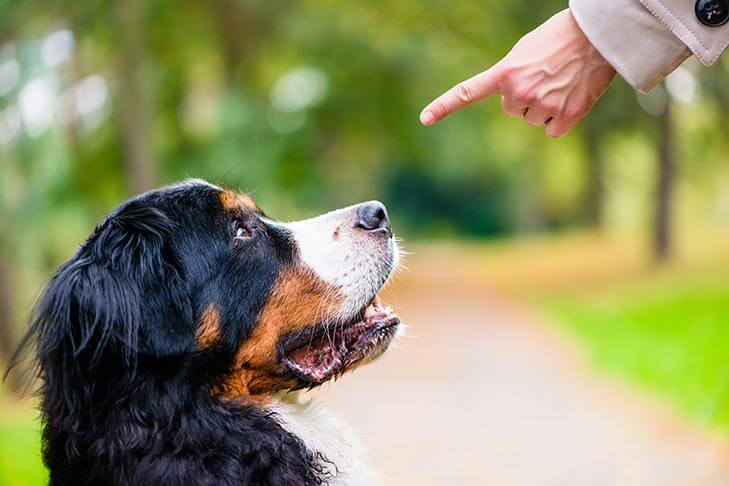
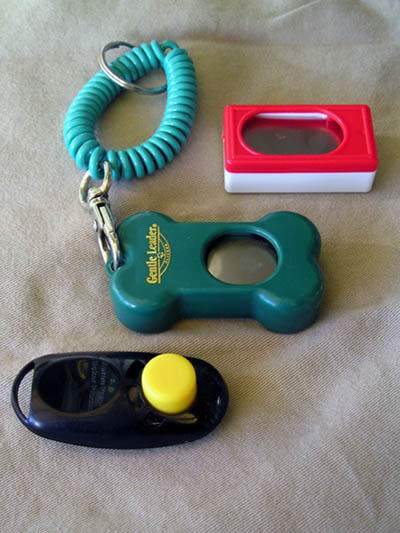
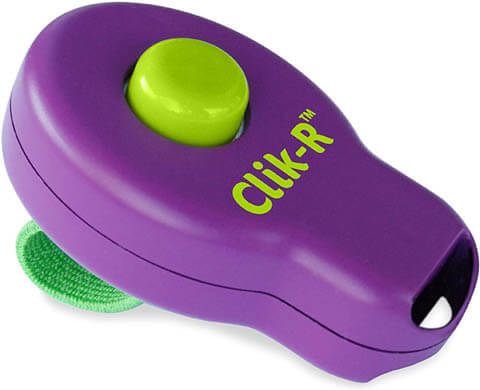
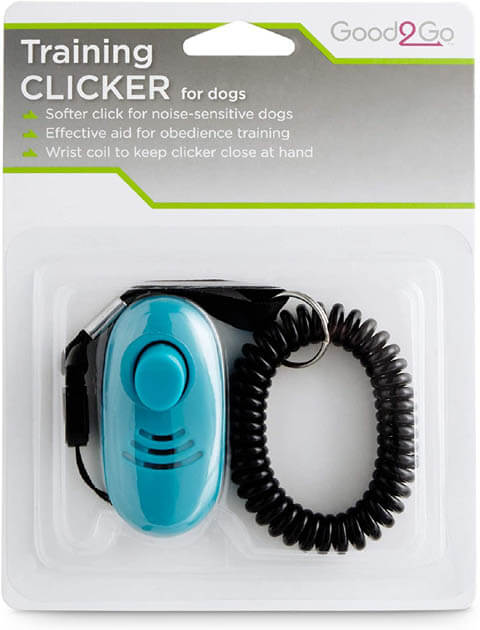

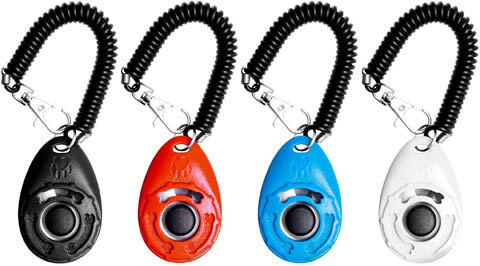
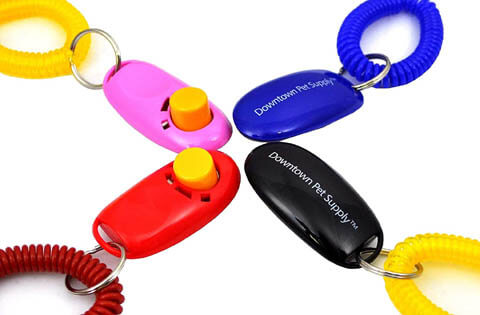
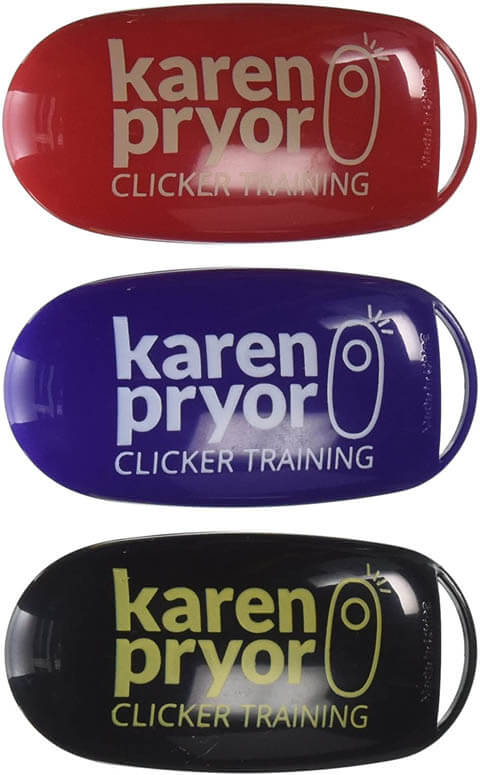
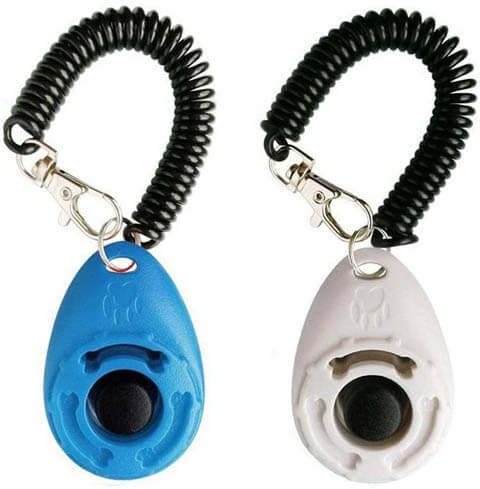
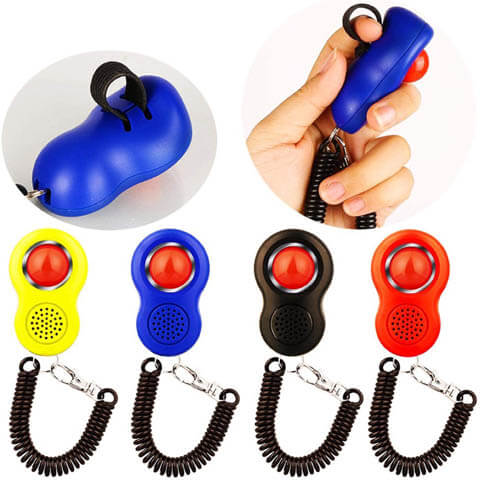
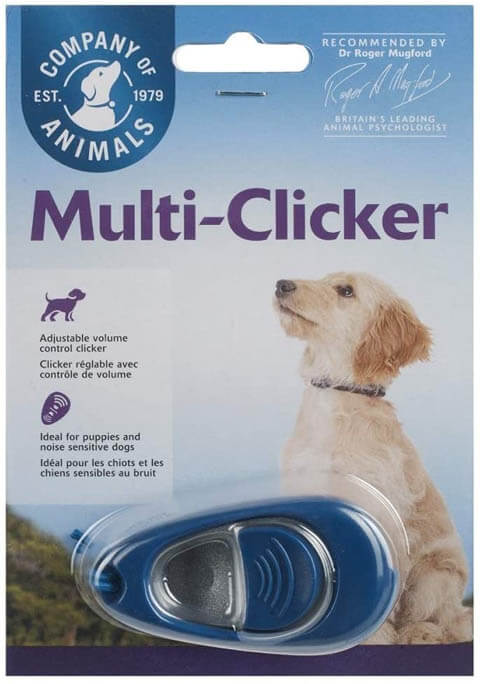
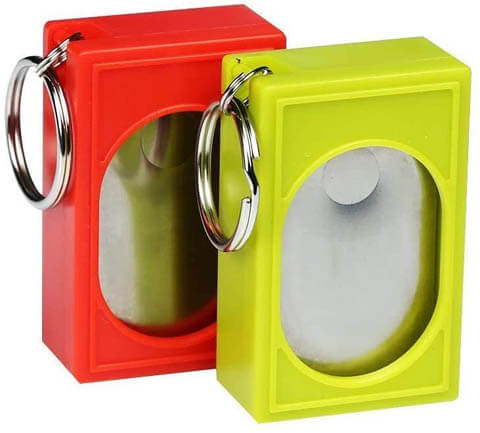
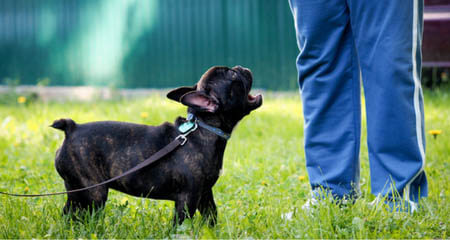


WORLD OF DOG & PUPPY 🐶